
Payment reminders guide
Payment reminders sends polite emails about unpaid invoices from your own mailbox, on a schedule you choose, until each invoice is paid. This guide explains every screen and option. Short on time? Follow the quick start, then come back to the sections you need.
Open Payment reminders How it works and plans
This guide shows 5 tasks step by step, as a short video and in pictures. Look for the sections marked “video”.
Quick start
- Open Connections, fill in Your email for sending with the SMTP details of the mailbox you invoice from, click Save, then click Send me a test email. See Connect your email.
- Open Payment reminders and click Reminder settings. Tick the reminders you want under When to send reminders, choose Send at and Your time zone, fill in How customers can pay and click Save settings.
- Click Add an invoice, fill in the invoice number, customer, amount and due date, and click Add invoice. To add many at once, click Import from a CSV file instead.
- Open the invoice. Check the Next reminder line and click Preview the next reminder to see the exact email your customer will get.
- When the money arrives, open the invoice and click Mark as paid. Reminders for it stop.
Reminders only go out while your free trial or a plan is active and your email is connected. Until then, the invoice list shows what is missing in a box headed Before reminders can go out.
Connect your email
The same steps in pictures:
-
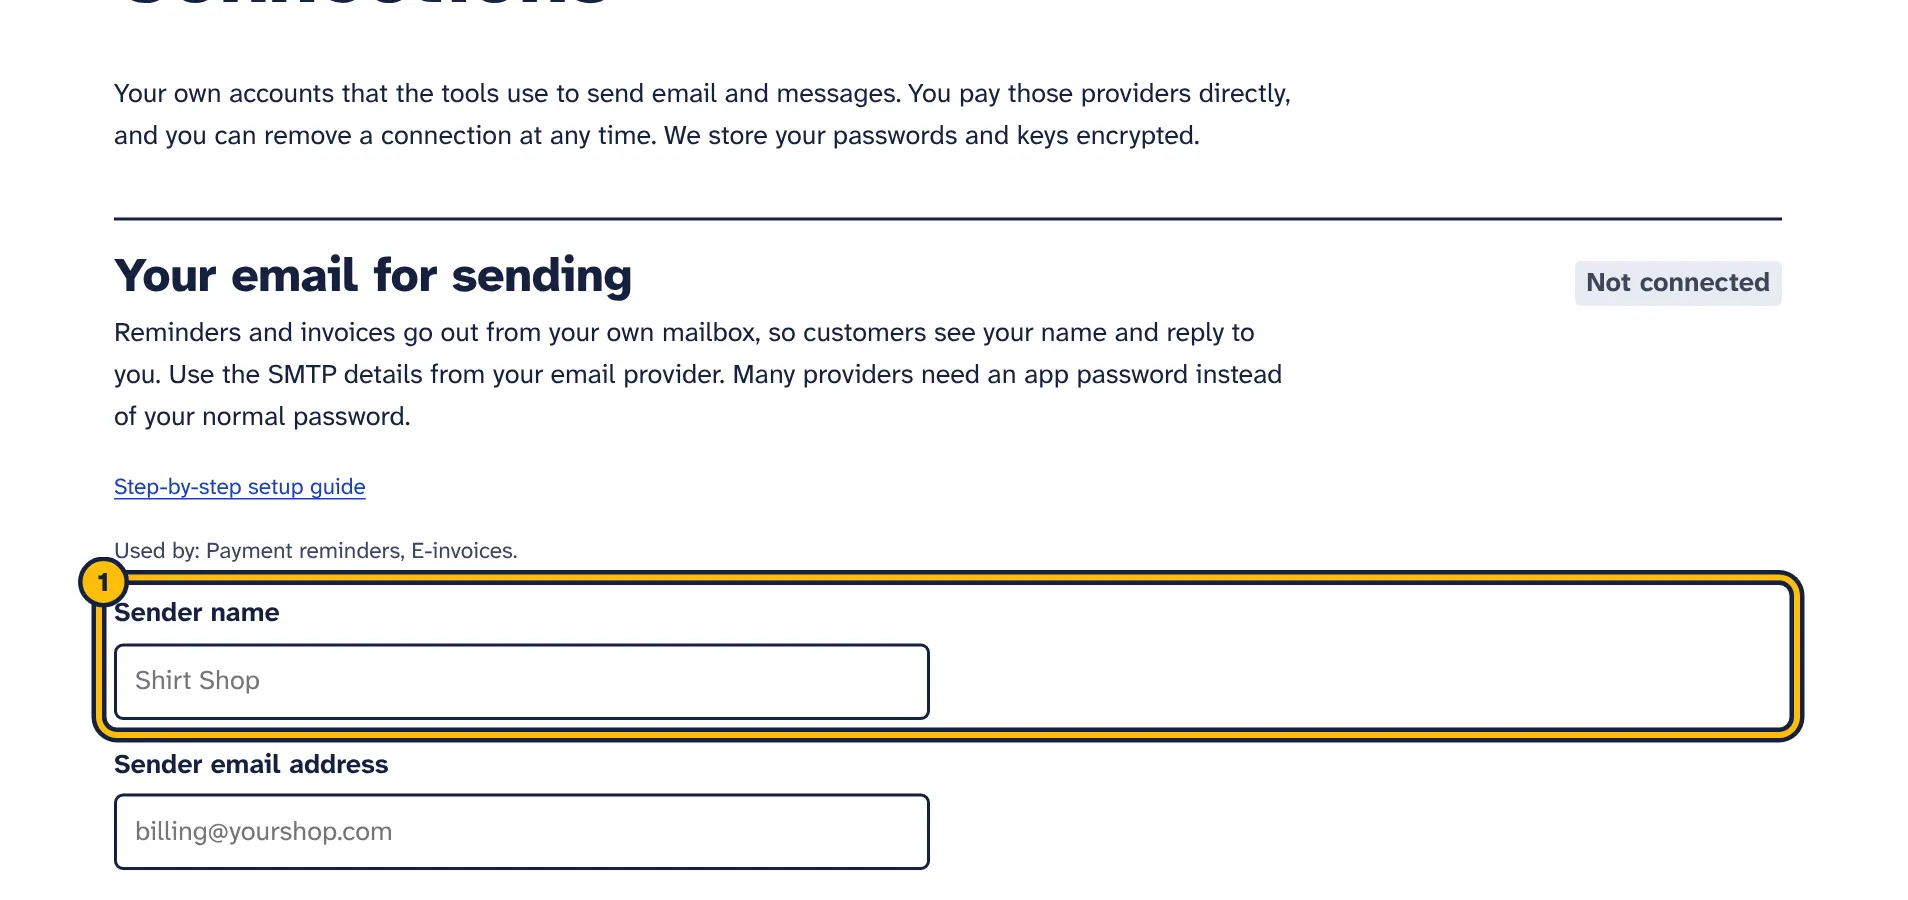
Step 1: Type the name your customers should see as the sender. -
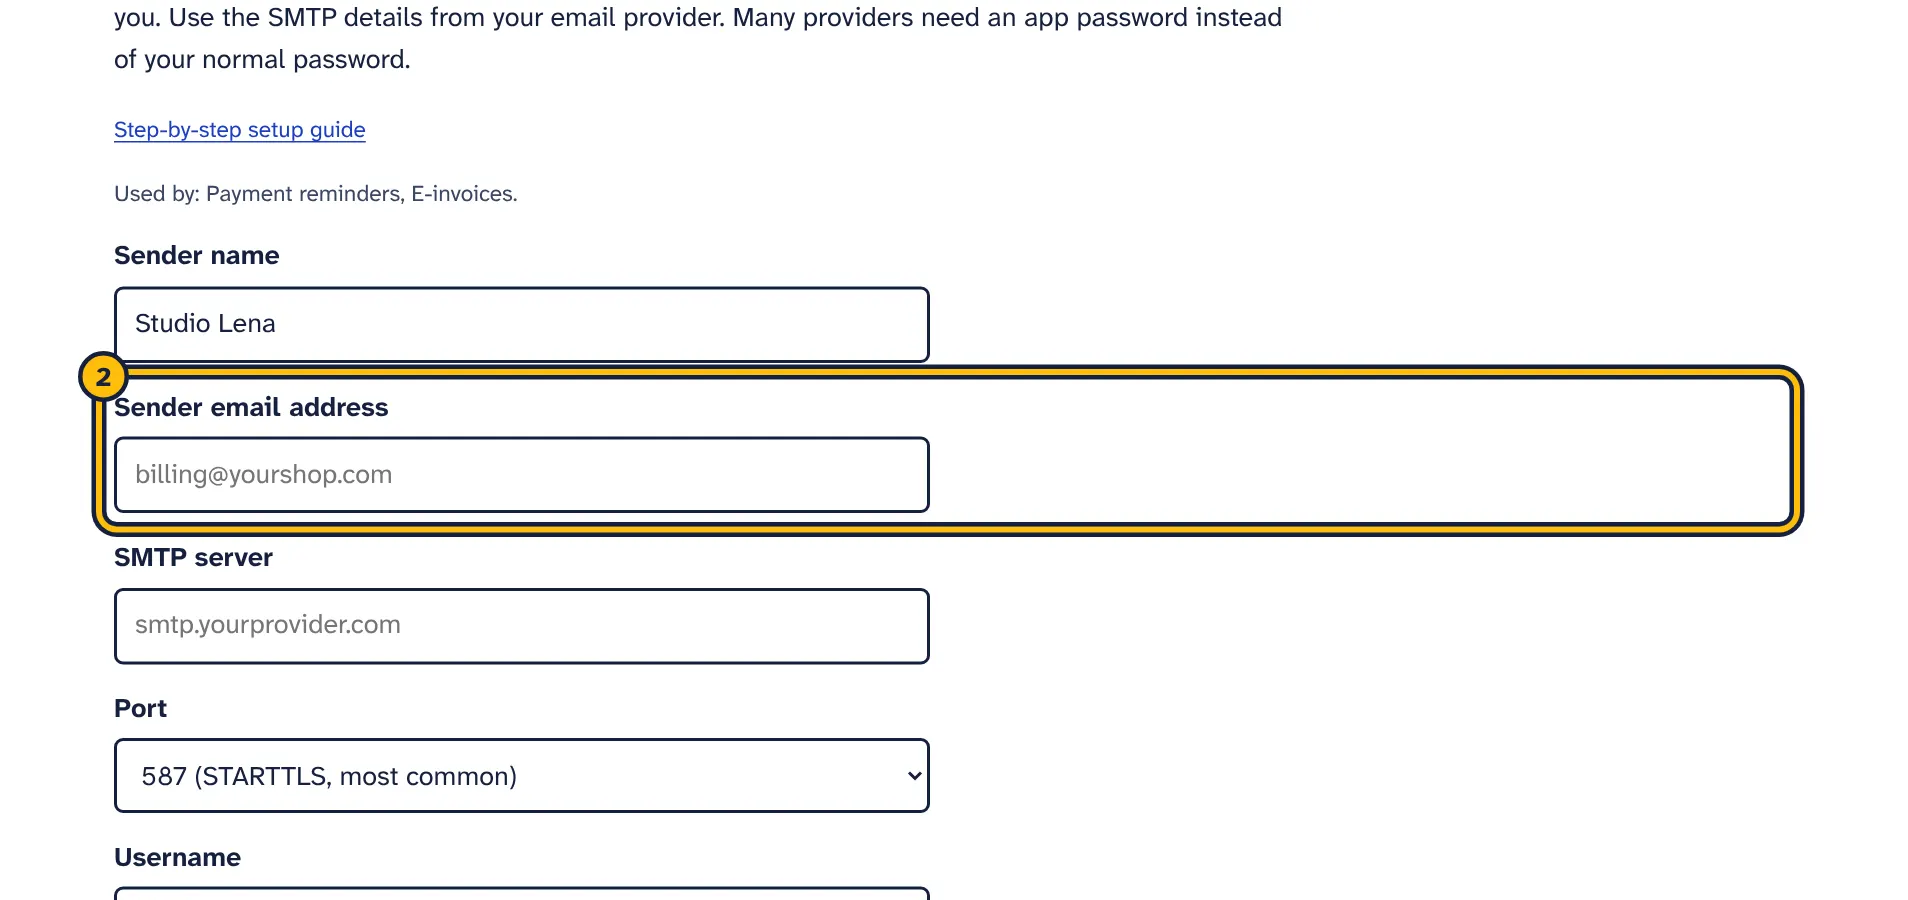
Step 2: Type the email address you send from. -
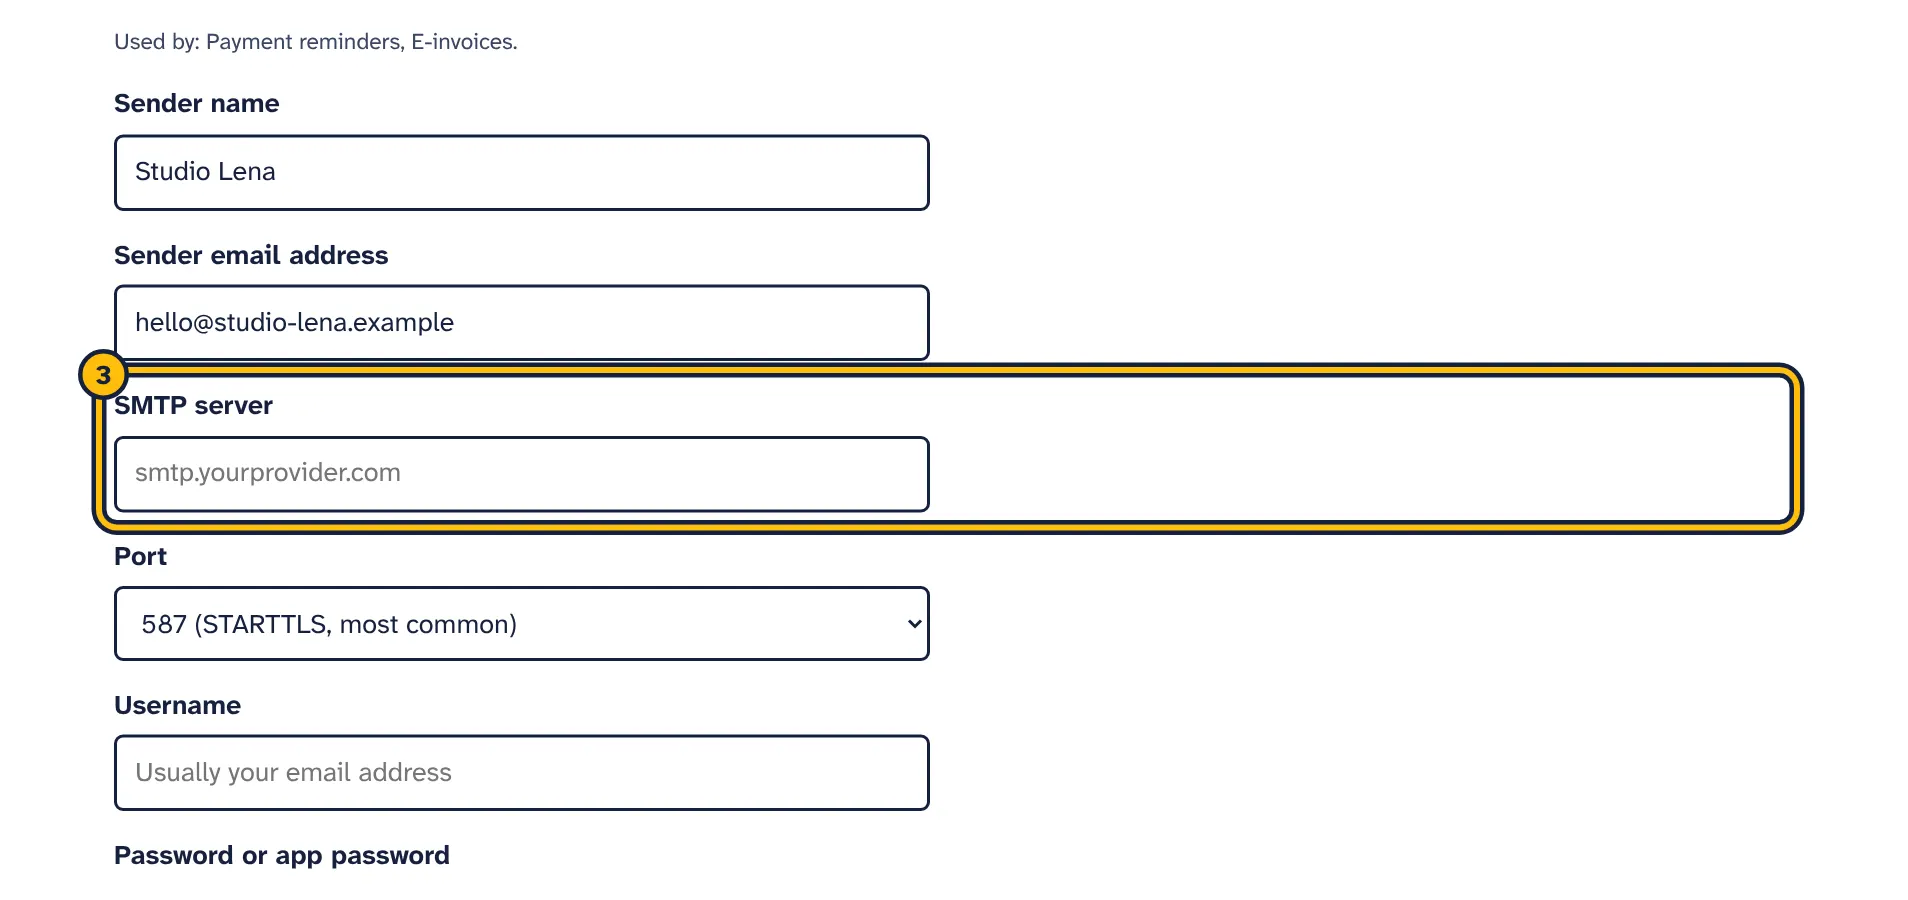
Step 3: Type your provider’s SMTP server. Your email provider’s help pages list it. -
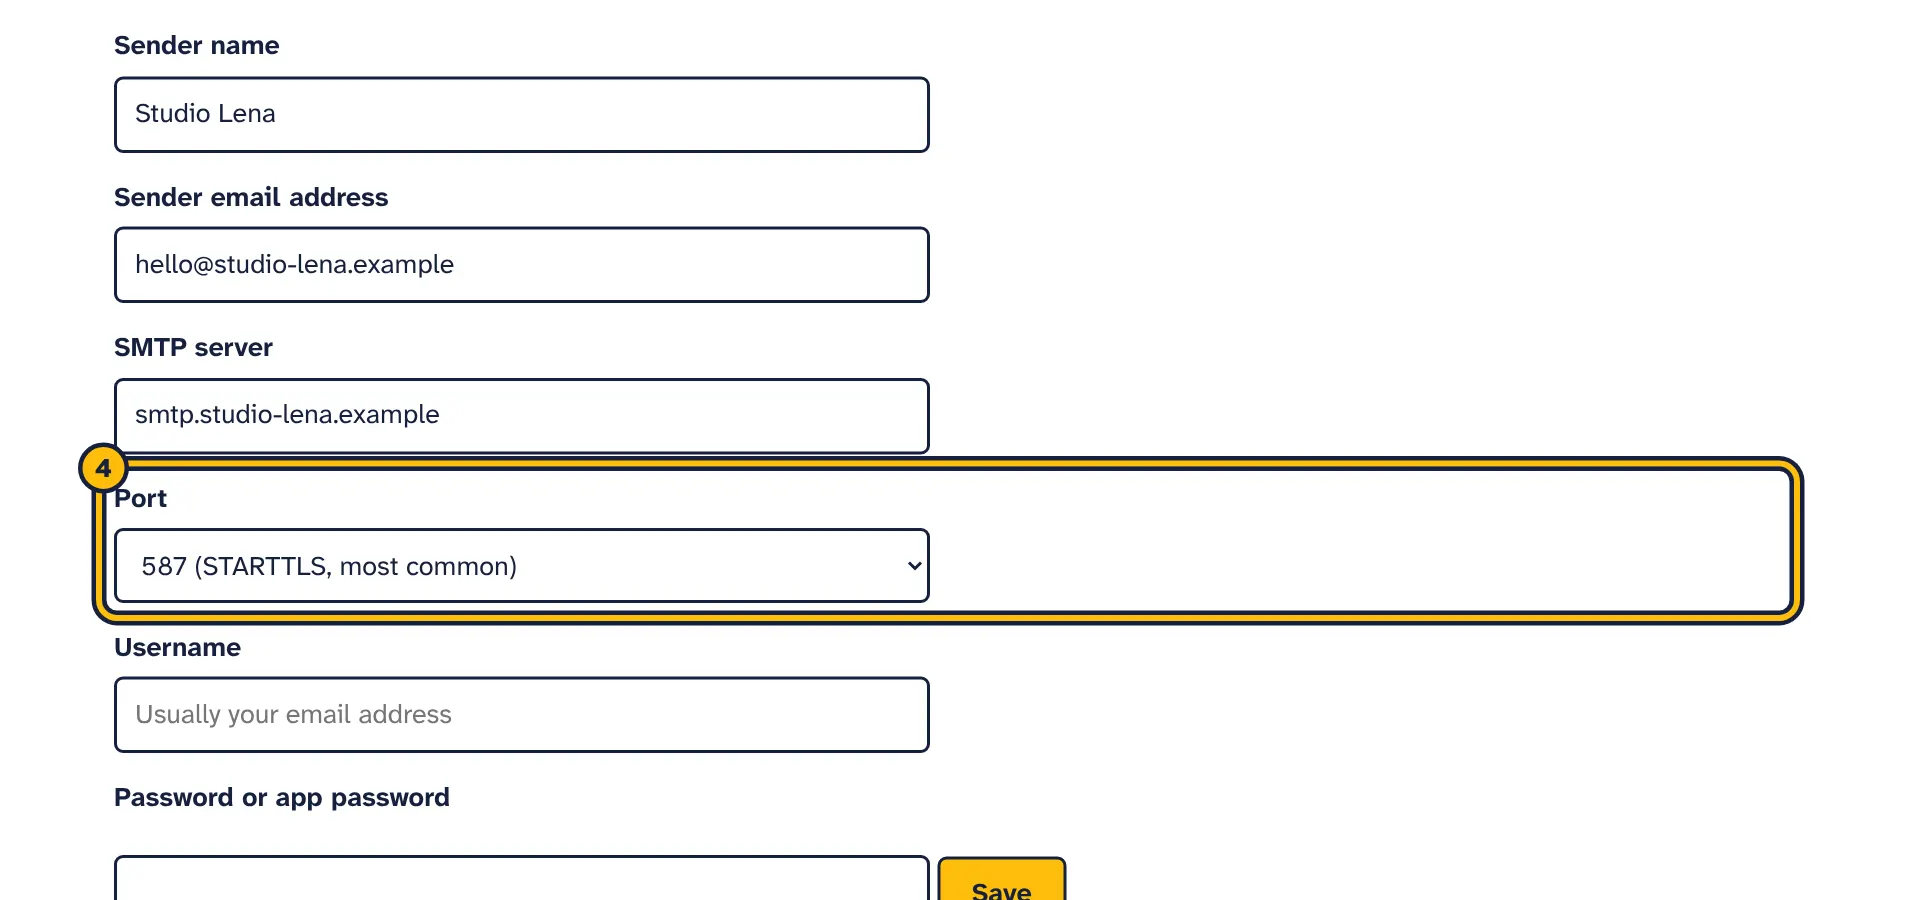
Step 4: Choose the port. 587 works for most providers. -
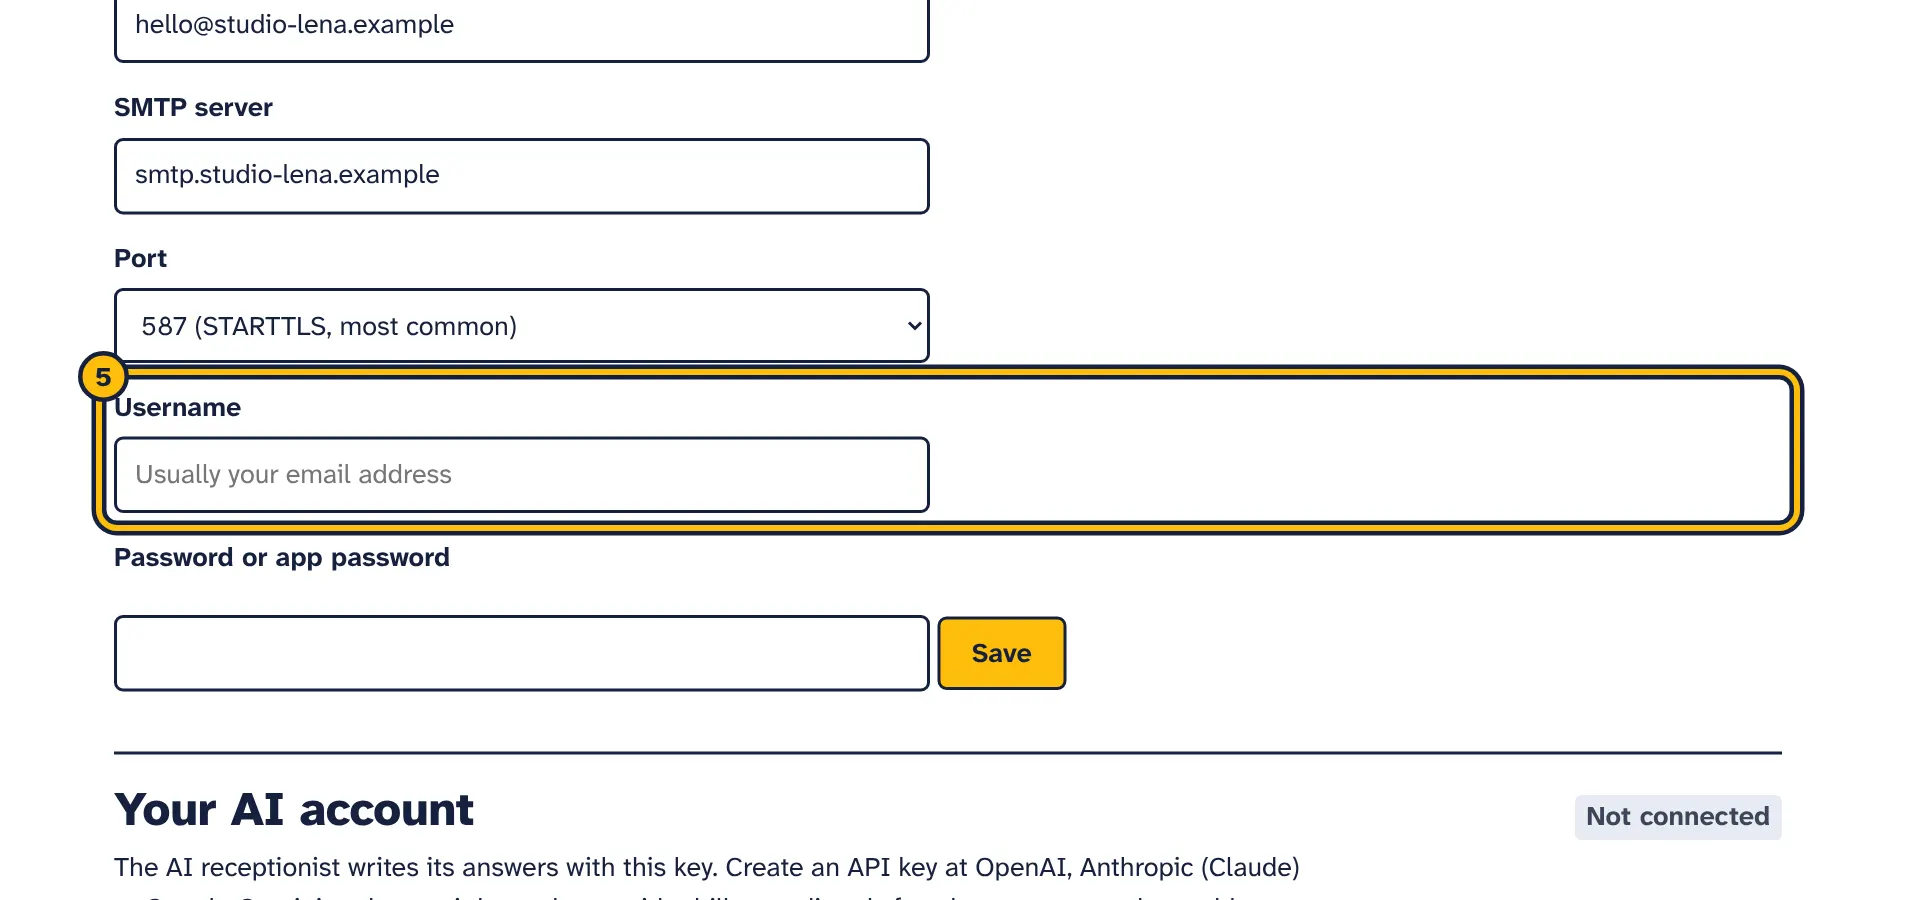
Step 5: Type your username, usually your full email address. -
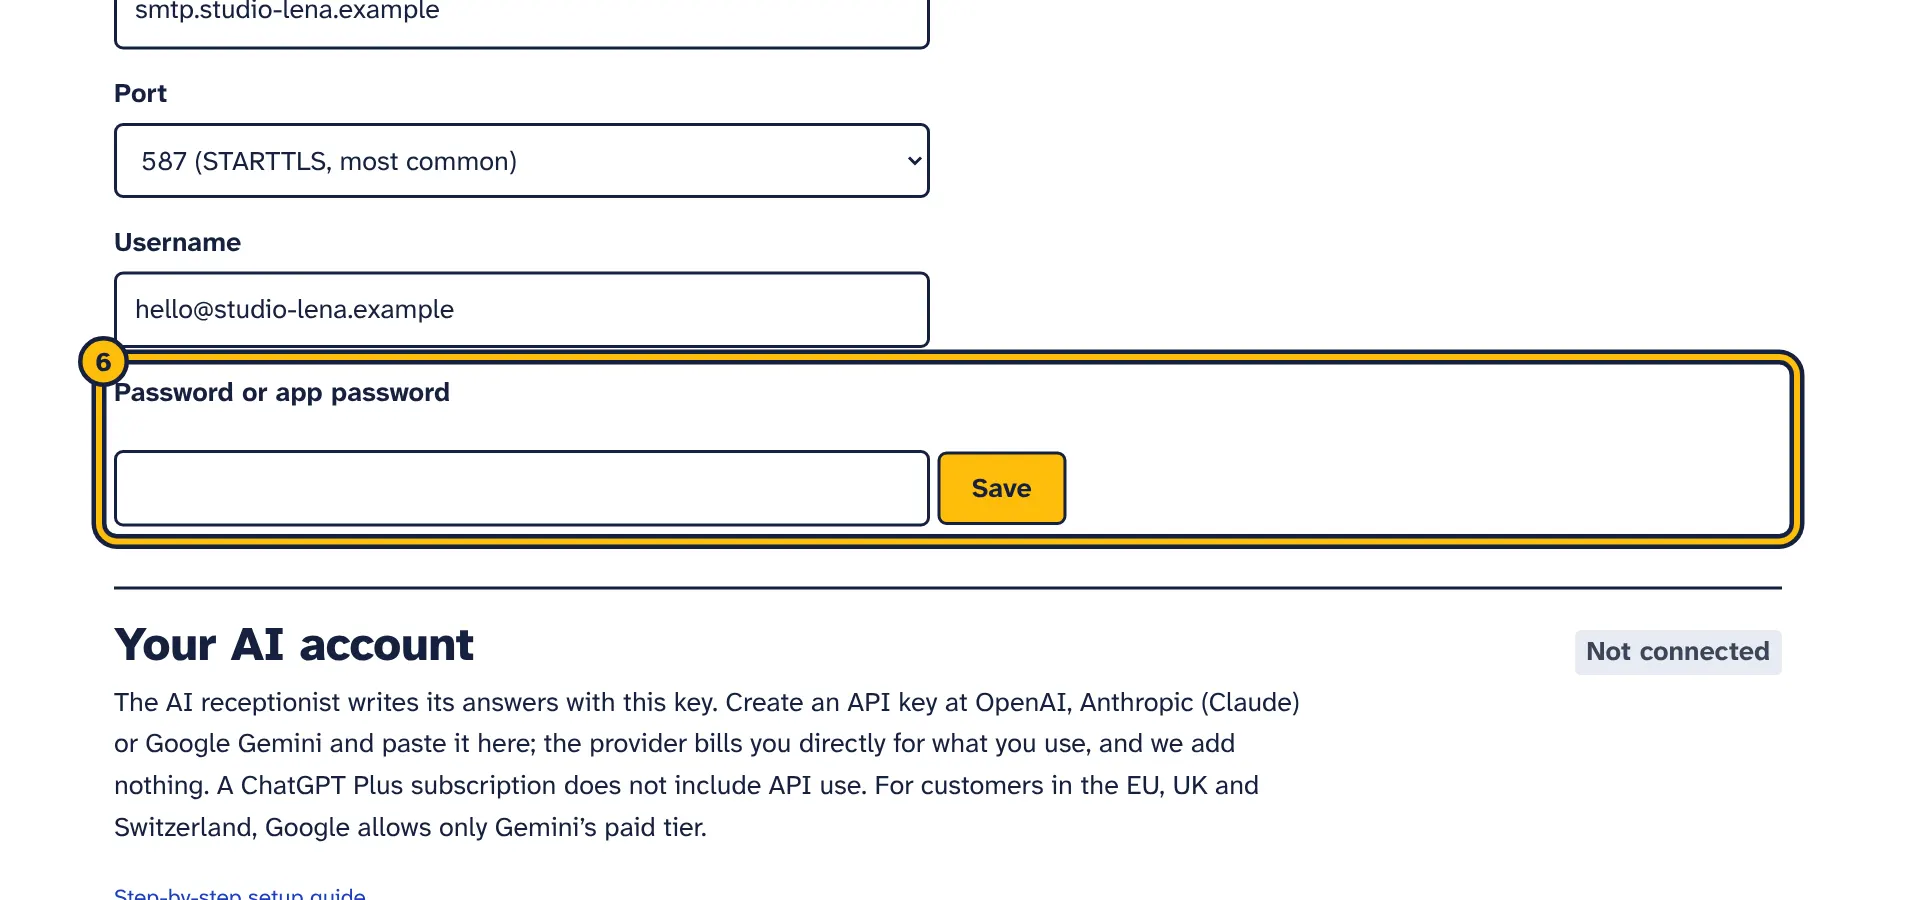
Step 6: Type your password, or an app password if your provider uses two-step login. -
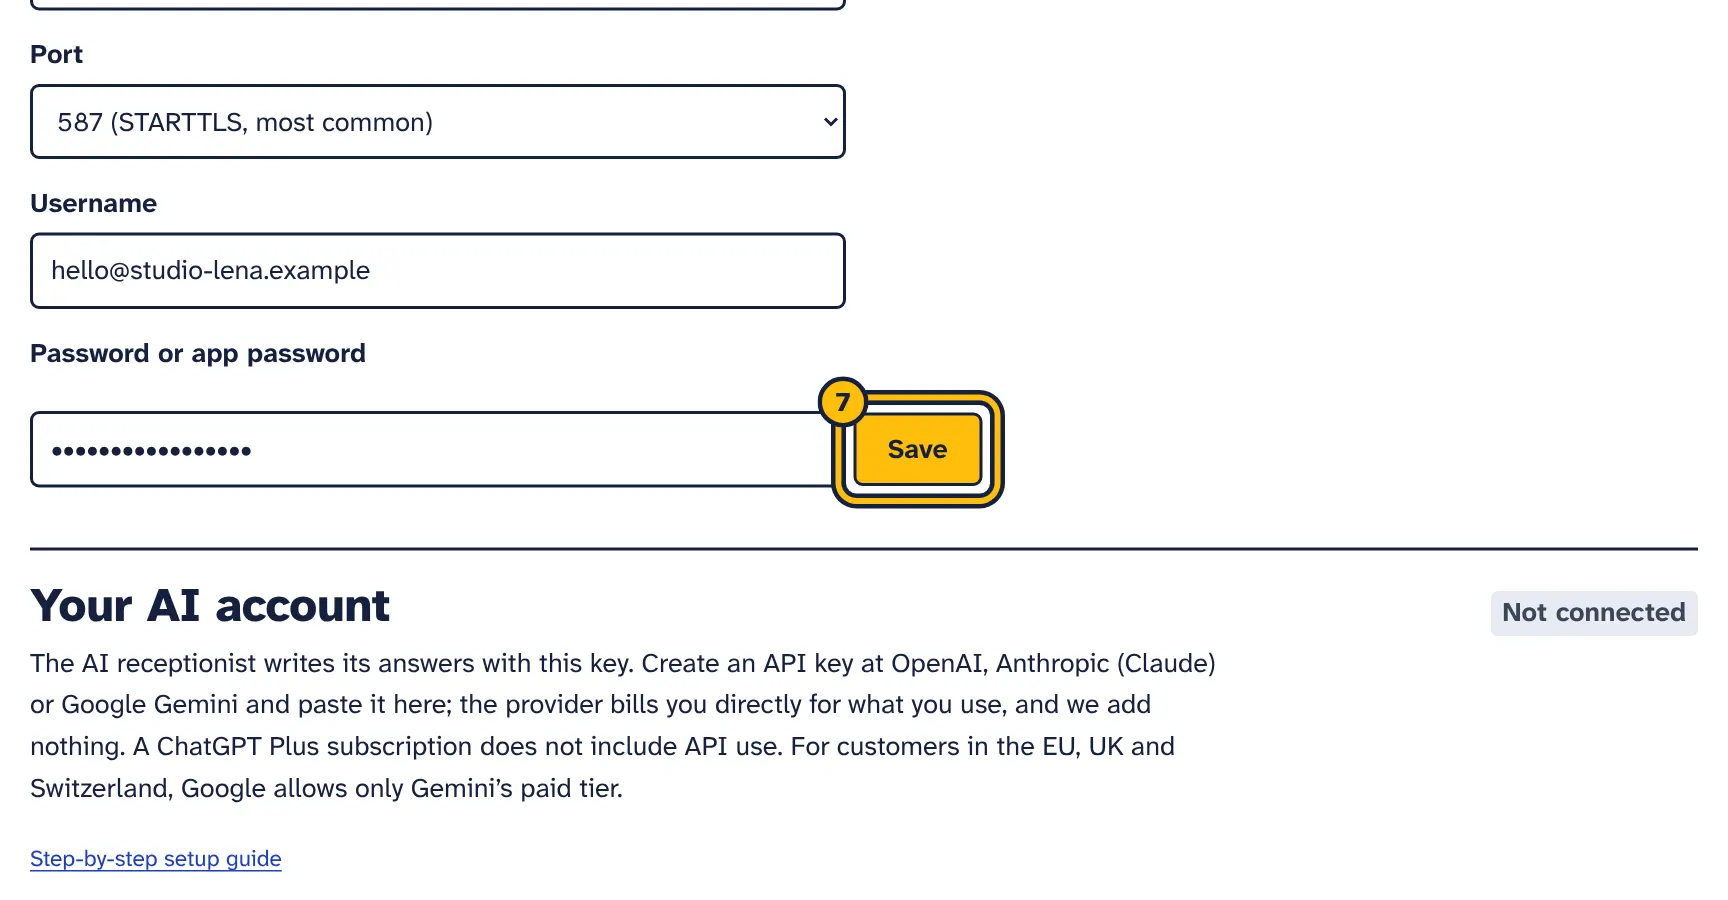
Step 7: Click Save. -
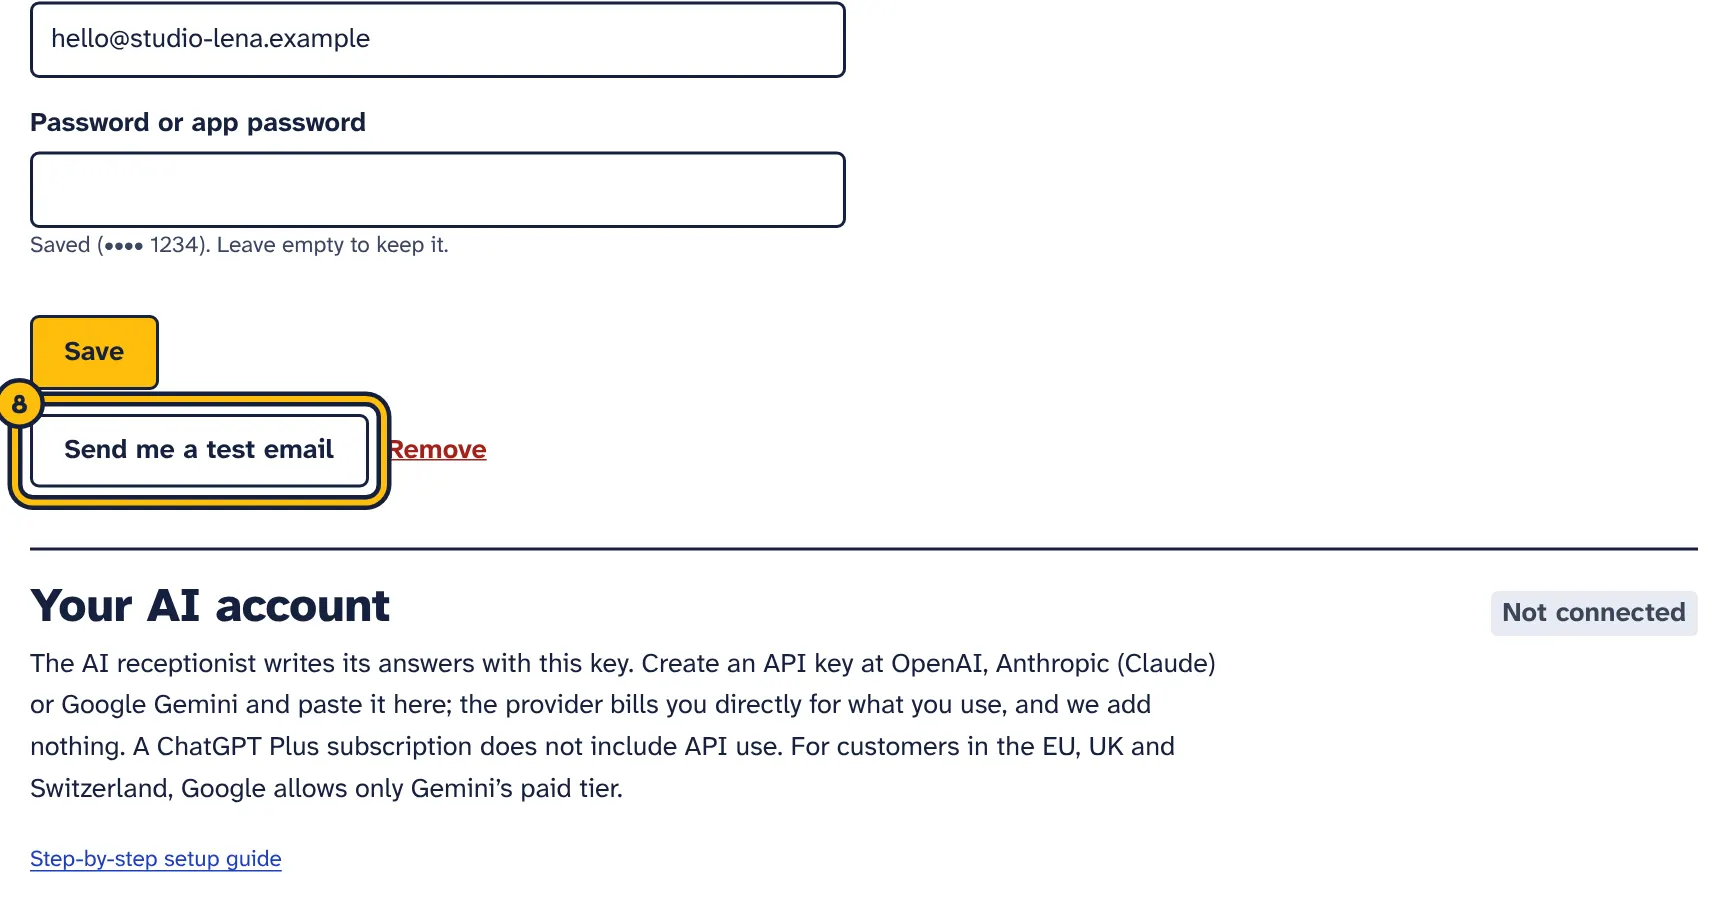
Step 8: Click Send me a test email to check that everything works. -
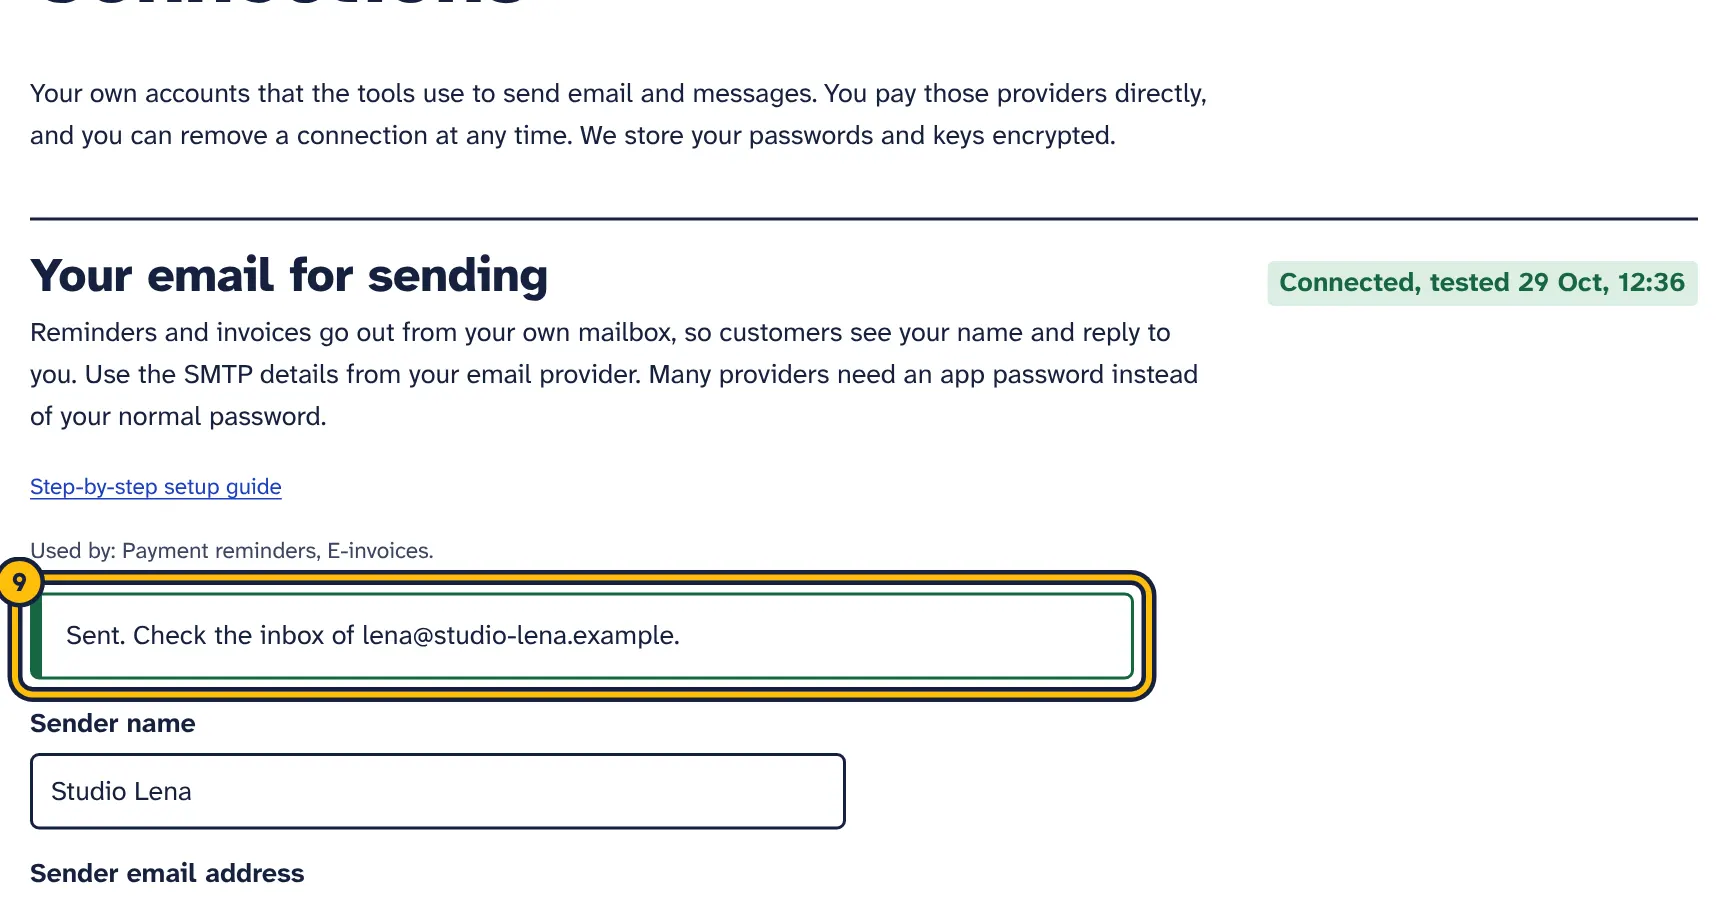
Step 9: A green message means the test email was sent. Check your inbox.
Reminders are sent through your own mailbox using SMTP, the standard way email programs send mail. Customers see your name and address, and their replies come back to your inbox. You set this up once under Connections, in the section Your email for sending. The E-invoices tool uses the same connection.
- Sender name
- The name your customers see as the sender, usually your business name. The sign-off at the bottom of each reminder uses the Business name from your account Settings.
- Sender email address
- The address reminders come from, such as
billing@yourbusiness.com. Use the address of the mailbox you sign in to below; many servers refuse any other. Replies go to this address. - SMTP server
- Your provider’s outgoing mail server, such as
smtp.yourprovider.com. Your provider’s help pages list it. It must be the server’s public name, not an internal address. - Port
- 587 (STARTTLS, most common) suits most providers. Choose 465 (SSL/TLS) if your provider says so. Use 2525 or 25 only if your provider asks for them. The connection is always encrypted: on 465 from the start, on the other ports with STARTTLS.
- Username
- Usually your full email address.
- Password or app password
- The password for this mailbox. Many providers ask for an app password instead: a separate password you create in your email account’s security settings. It is stored encrypted, and afterwards only its last four characters are shown. When you change other fields, leave it empty to keep the saved password.
- Go to Connections and find Your email for sending.
- Fill in the fields and click Save. The status shows Saved, not tested yet.
- Click Send me a test email. A test message is sent from your mailbox to the address you log in with. If it works, you see “Sent. Check the inbox of …” and the status changes to Connected, tested with the date and time.
- Check that the test email arrived, and that it is not in your spam folder.
Settings for your email provider
For Gmail, for example, you use the SMTP server smtp.gmail.com, port 587, your full Gmail address as the username and an app password. Step-by-step instructions for Gmail, Microsoft 365 and other providers, including how to create an app password, are in the connections guide.
Changing or removing the connection
Change the fields and click Save again. After a change, the status goes back to Saved, not tested yet, so send another test email. Click Remove to delete the connection; reminders stop going out until you connect an email again.
If your provider only lets its own apps sign in and offers no SMTP password or app password, the connection cannot work, because reminders are sent with a username and password. Your provider’s daily sending limits also apply.
Reminder settings at a glance
The same steps in pictures:
-
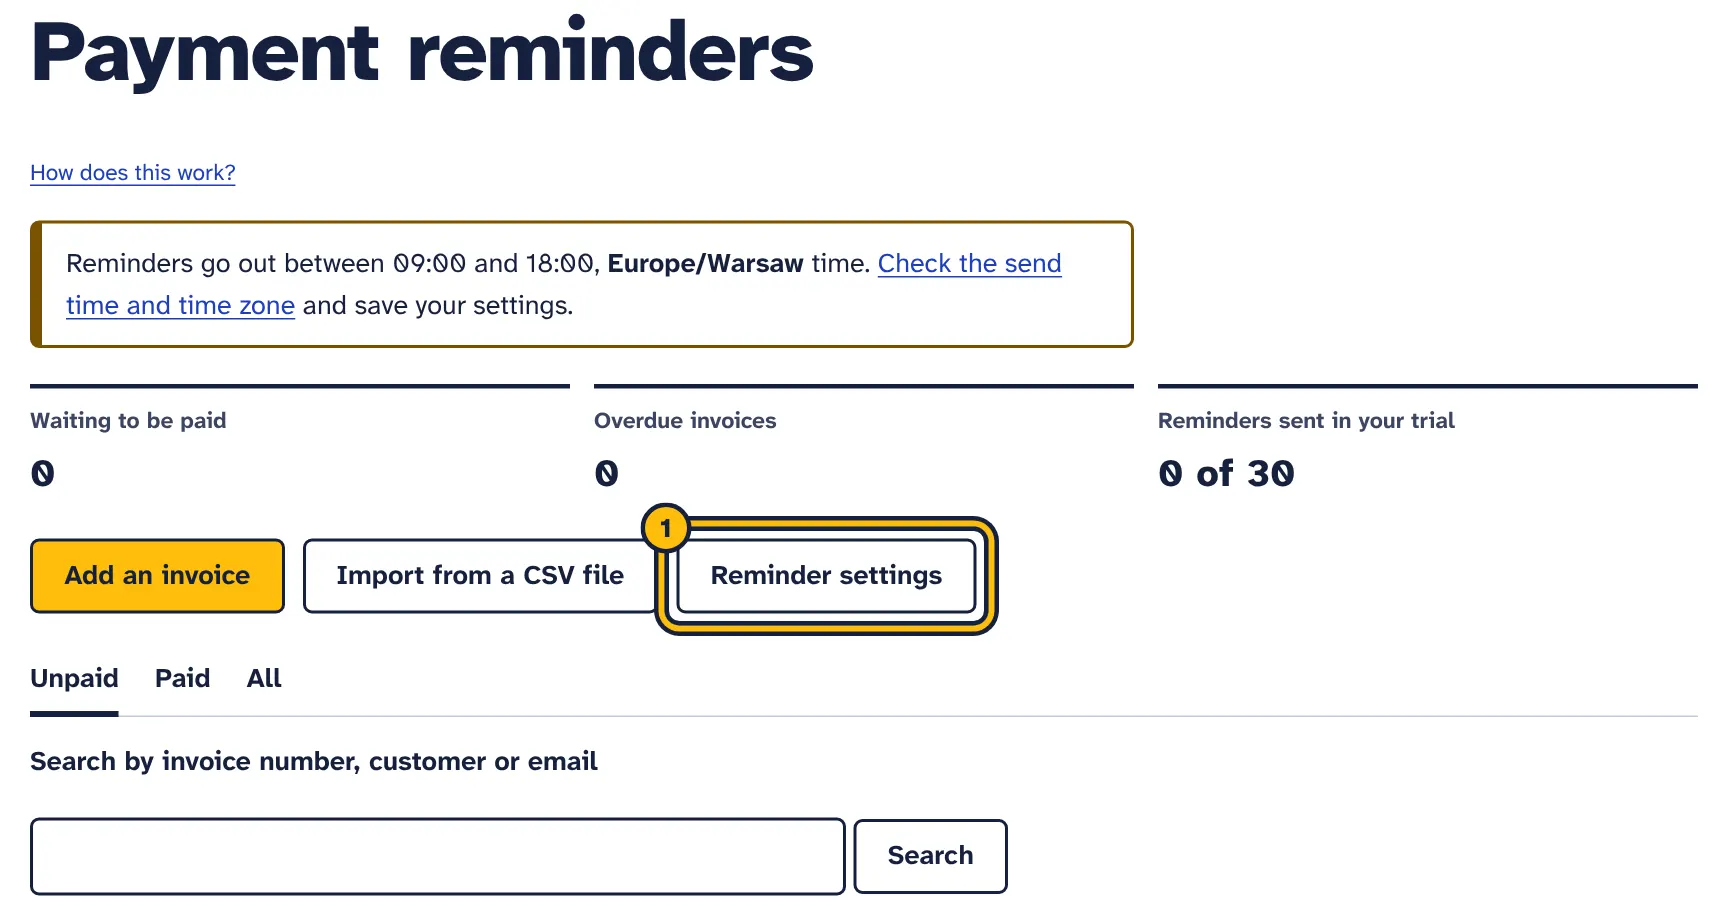
Step 1: Click Reminder settings. -
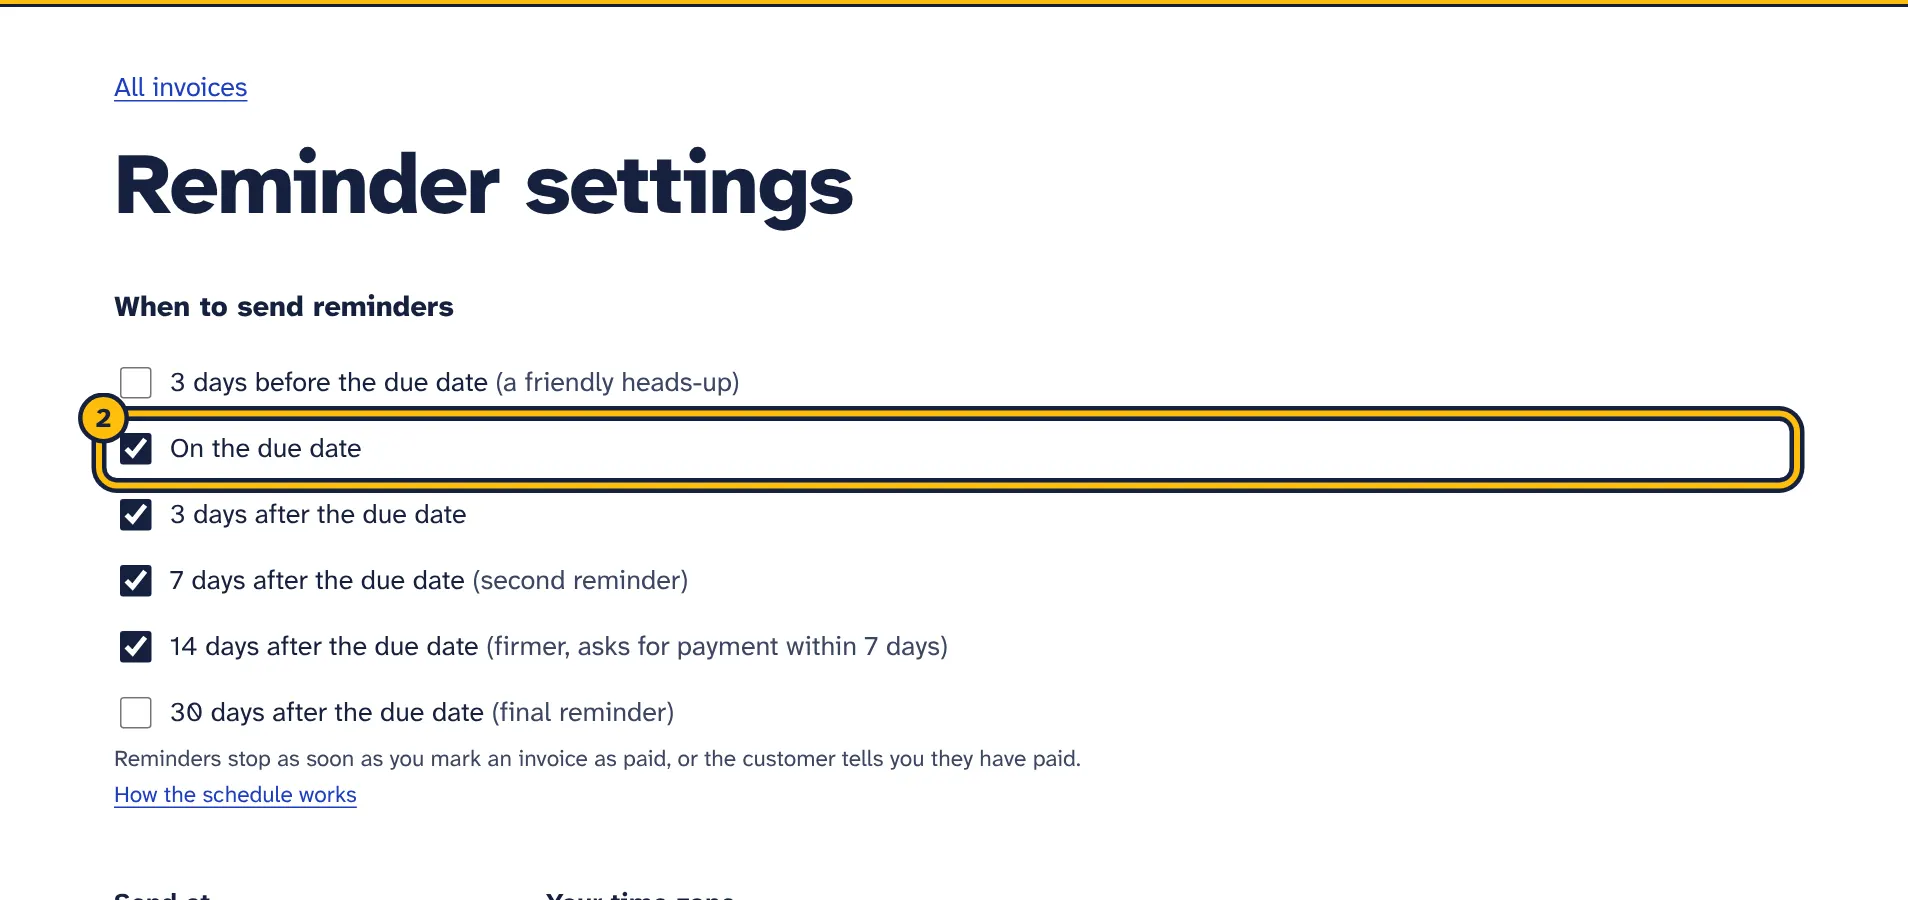
Step 2: Tick the days you want a reminder sent, for example on the due date… -
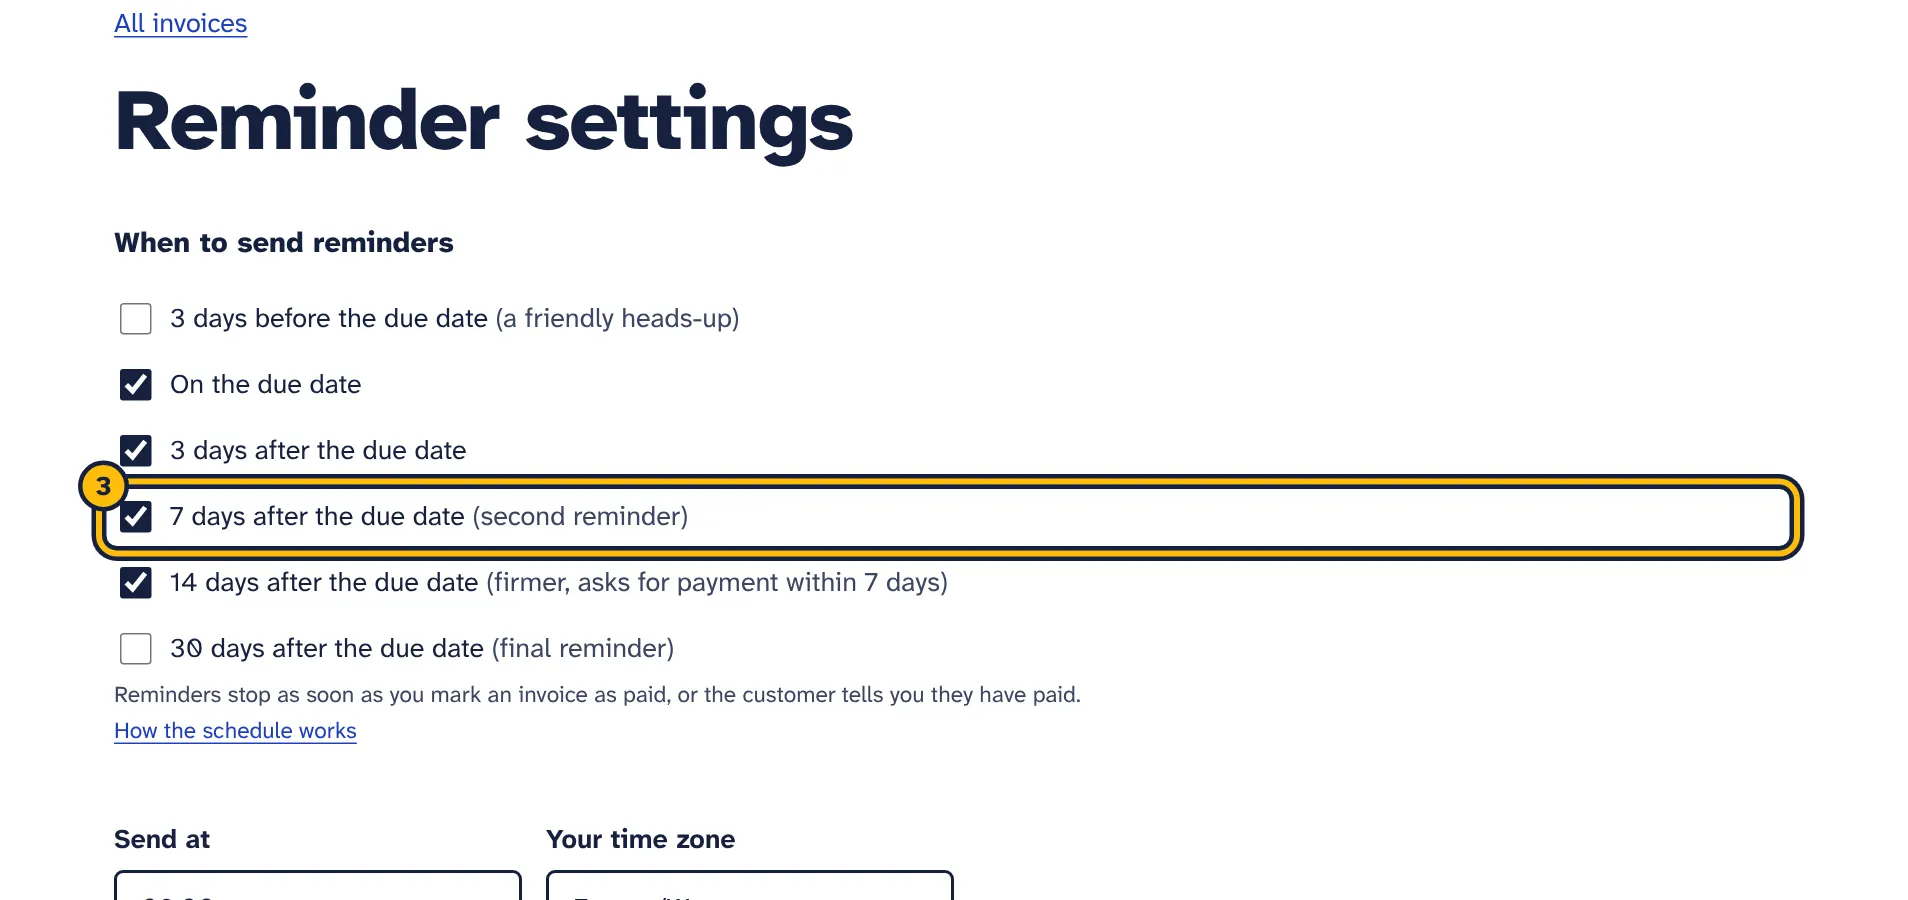
Step 3: …and 7 days after it. -
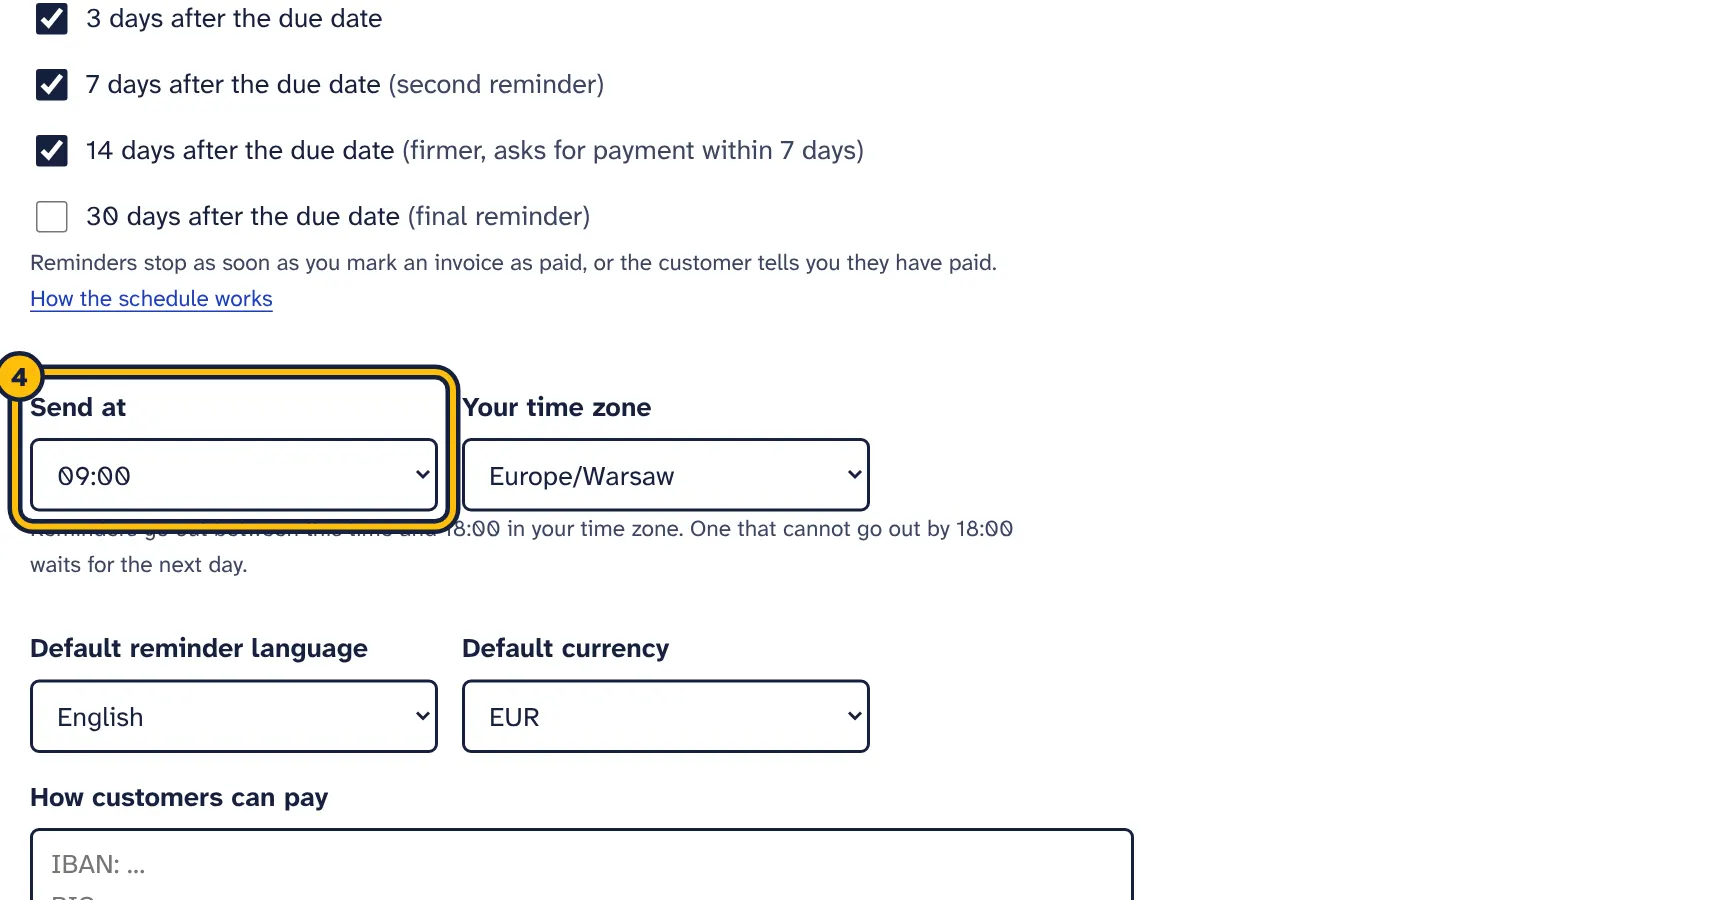
Step 4: Choose the hour reminders are sent. -
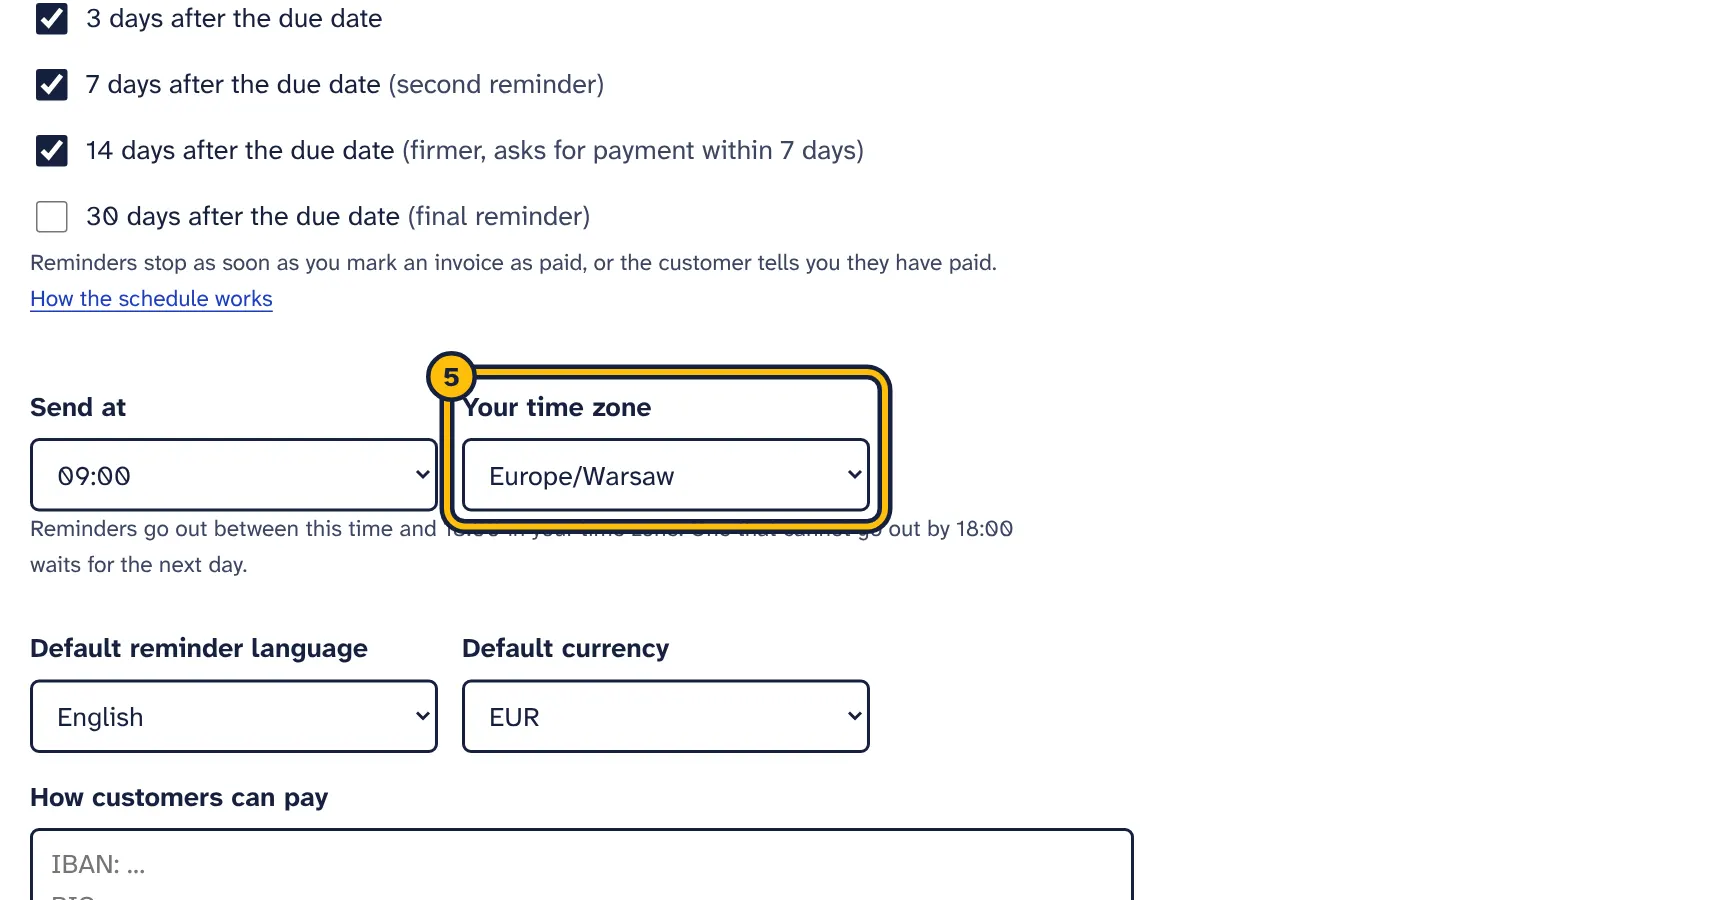
Step 5: Choose your time zone. -
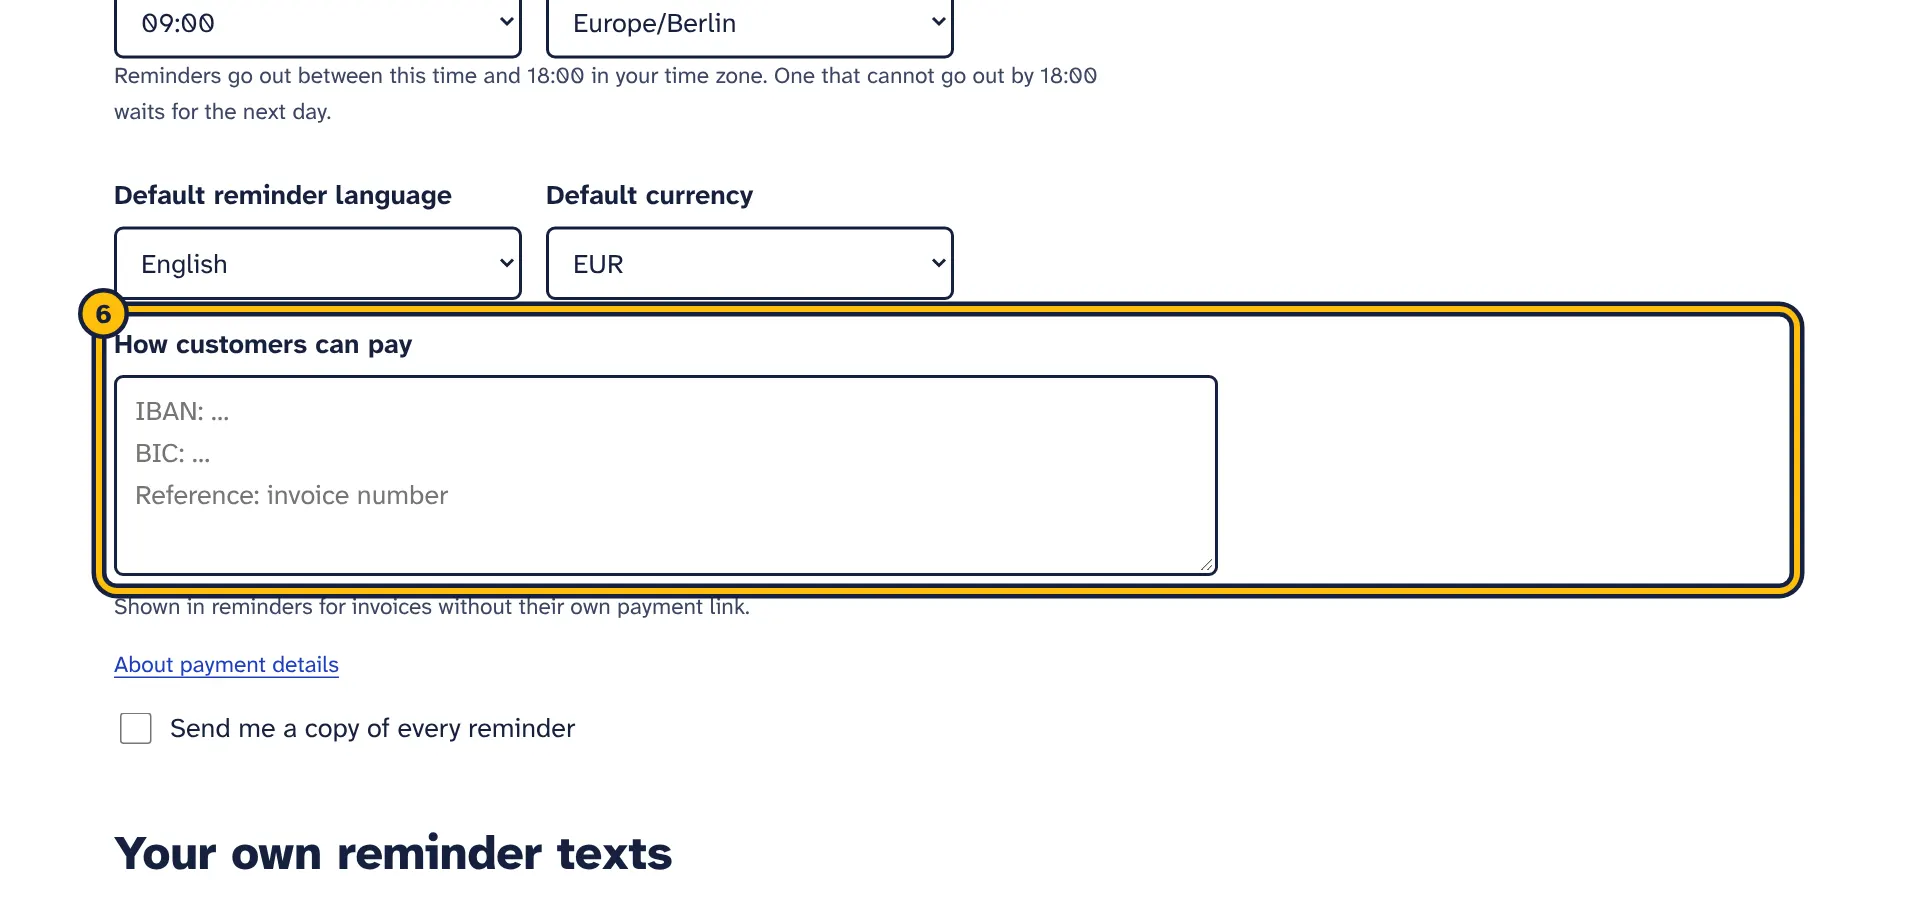
Step 6: Tell customers how to pay you. This text goes into every reminder. -
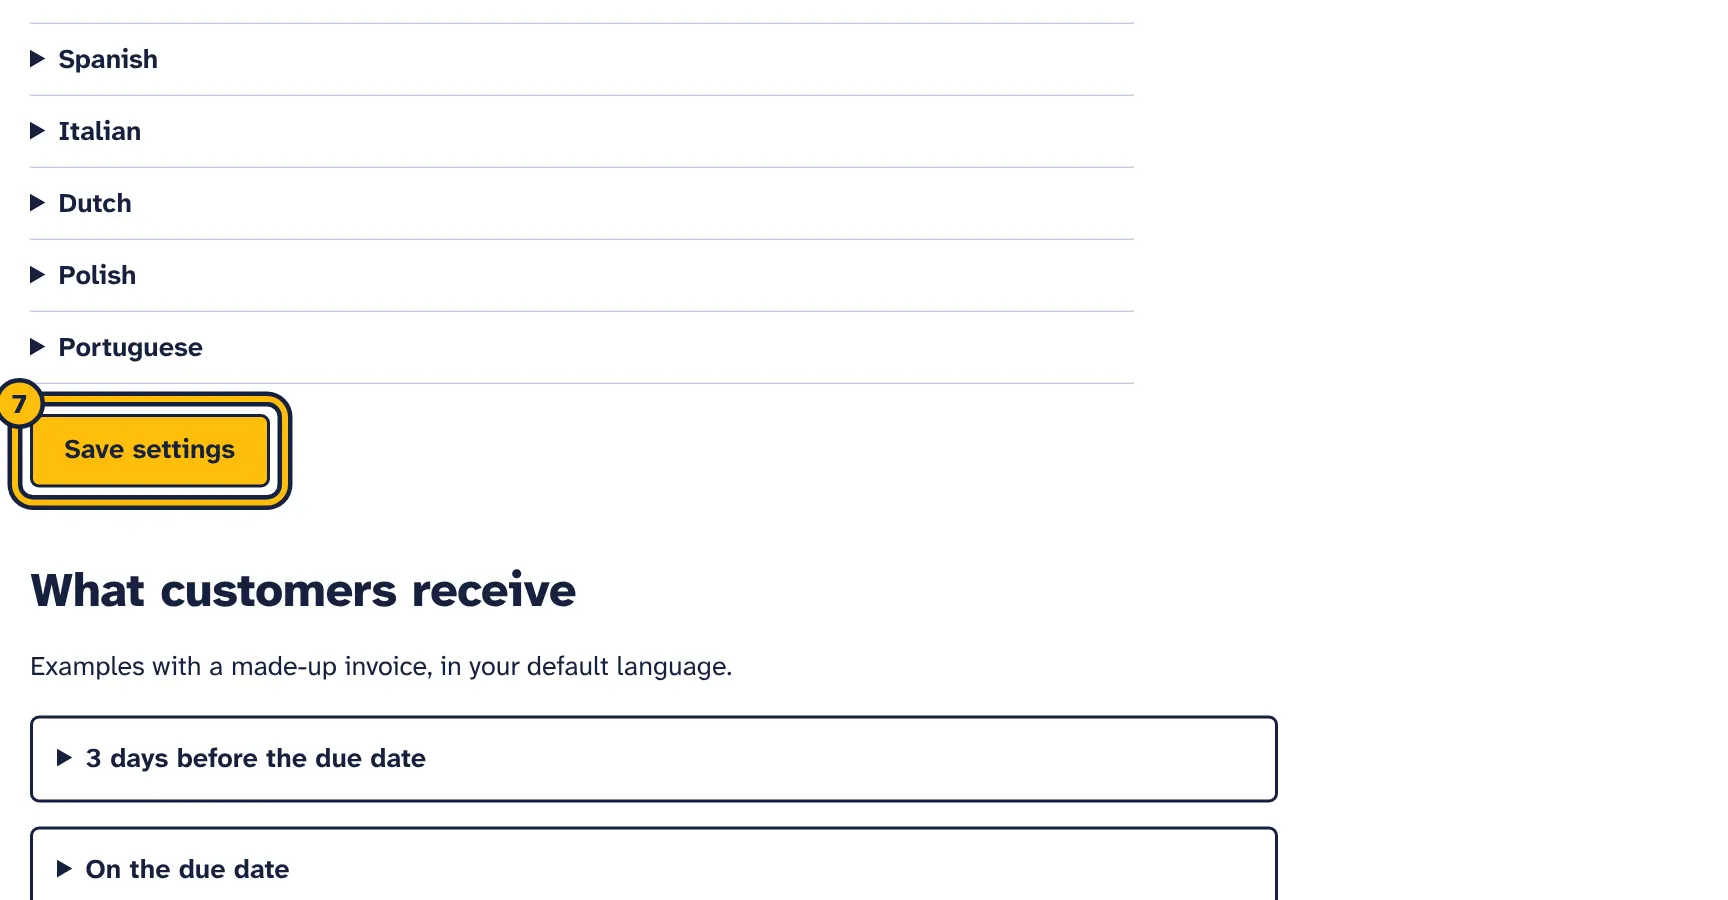
Step 7: Click Save.
Open Payment reminders and click Reminder settings. Click Save settings when you are done. Changes apply from the next check, to all invoices.
- When to send reminders
- The reminder stages to use. At least one must be ticked. See When reminders go out.
- Send at
- The hour from which reminders go out, from 06:00 to 17:00. The default is 09:00. Reminders only go out between this hour and 18:00. See When reminders go out.
- Your time zone
- Used for the sending hours and for deciding which day it is. Until you save the settings, the time zone your browser reports the first time you open Payment reminders is used, and the invoice list asks you to check it. Without JavaScript in your browser, UTC is used until you save.
- Default reminder language
- Selected for each new invoice you add, and used for imported rows without a language. Each invoice keeps its own language. See Languages and reminder texts.
- Default currency
- Selected for each new invoice you add, and used for imported rows without a currency.
- How customers can pay
- Your bank details or other payment instructions, up to 1,000 characters. Shown in reminders for invoices that have no payment link of their own. See Payment link and payment details.
- Send me a copy of every reminder
- When ticked, a blind copy of every reminder goes to the email address you log in with. Your customer does not see it, and copies do not count towards your limit.
- Your own reminder texts
- A subject and message for each stage, in each of the 8 languages, on the Pro plan and during the free trial. See Languages and reminder texts.
Below the form, What customers receive shows every stage as an example email for a made-up invoice, in your default language and currency, using your current settings. The last example is the email that goes out when the first reminder for an invoice is the 7-day or 30-day one.
If saving fails, the message says why, for example “Turn on at least one reminder.” or “Write both a subject and a message for the German reminder …, or leave both empty.”
When reminders go out
Each reminder stage is a number of days before or after the invoice’s due date. Tick the ones you want under When to send reminders in Reminder settings.
- 3 days before the due date: a friendly heads-up. Off by default.
- On the due date: on by default.
- 3 days after the due date: the first overdue reminder. On by default.
- 7 days after the due date: the second reminder. On by default.
- 14 days after the due date: firmer, asks for payment within 7 days. On by default.
- 30 days after the due date: the final reminder. Off by default.
Sending hours and time zone
Every 15 minutes, the tool checks all unpaid invoices. Reminders only go out between the hour you chose under Send at and 18:00, in Your time zone, and most go out within 15 minutes of your chosen hour. A reminder that has to wait, for example because you connected your email in the afternoon or a failed send is being retried, goes out later the same day if that is before 18:00, and otherwise the next day from your chosen hour. Reminders are never sent in the evening or at night.
Due dates are counted in your time zone, so “due today” means today where you are. Reminders go out on every day of the week, including weekends and public holidays.
Rules that keep reminders polite
- Each stage is sent only once for each invoice.
- When an invoice has reached several stages, only the most recent one is sent. An invoice you add when it is 20 days late gets the 14-day reminder, not four emails at once. The same applies after a pause: reminders never catch up.
- Once a stage has been sent, earlier stages are never sent afterwards.
- There are always at least 36 hours between two reminders for the same invoice, including reminders you send by hand.
- The heads-up 3 days before the due date is only sent before the due date. If you add an invoice on or after its due date, it is skipped.
- Only invoices with the status Reminders on get reminders. Paid, paused and Customer says paid invoices get nothing.
See what happens next
The Next reminder column in the invoice list shows the day and stage of each invoice’s next reminder, or None planned. The day takes the sending hours, the 36-hour gap and retries into account, so “Today” means it will really go out today. The invoice page shows the same and lets you preview the email.
If sending fails
If your mail server refuses a reminder, it is tried again after at least 3 hours, within the sending hours, up to 3 attempts for each stage. The invoice history shows the reason. The first time an automatic reminder for an invoice fails, we email you the error with a link to Connections. After 3 failed attempts, that stage is skipped and the next stage is tried on its date. When you send a reminder by hand, any error is shown on the invoice page instead.
Languages and reminder texts
Ready-made texts in 8 languages
Every stage has a ready-made text in English, German, French, Spanish, Italian, Dutch, Polish and Portuguese. Each invoice has its own Language of the reminders; new invoices start with your Default reminder language. Amounts and dates are written the way that language does, for example €1,250.00 and 14 October 2026 in English, or 1.250,00 € and 14. Oktober 2026 in German.
- 3 days before: “Invoice {invoice} is due on {due_date}”, a friendly heads-up.
- On the due date: “Invoice {invoice} is due today”, with thanks if payment is already arranged.
- 3 days after: “Reminder: invoice {invoice} is overdue”, suggesting it may have slipped through.
- 7 days after: “Second reminder: invoice {invoice}”, with the days overdue and an invitation to reply if there is a problem.
- 14 days after: “Payment overdue: invoice {invoice}”, asking for payment within 7 days.
- 30 days after: “Final reminder: invoice {invoice}”, asking for payment within 7 days and saying further steps may follow.
The 7-day and 30-day texts refer to earlier reminders. If one of them is the first reminder an invoice gets, for example because you added the invoice when it was already late, a first notice is sent instead: “Invoice {invoice} is {days} days overdue”, saying that payment has not been received yet and asking for it within 7 days or a reply if there is a problem. What customers receive in Reminder settings shows this email too.
What every reminder contains
- A greeting with the customer name, such as “Hello Northwind Ltd,”. Enter a contact person as the customer name if you prefer “Hello Anna,”.
- The message for the stage.
- Your payment link under “Pay online:”, or your payment details under “Payment details:”.
- The line “Already paid? Let us know with one click:” and a link to your customer’s page.
- A sign-off with your business name.
- The invoice PDF as an attachment, if you uploaded one.
Reminders are plain-text emails. This is the English reminder 7 days after the due date, for an invoice without a payment link:
Subject: Second reminder: invoice INV-1042

Hello Northwind Ltd,

Invoice INV-1042 for £1,250.00 is now 7 days overdue (due on 14 October 2026). Please arrange payment as soon as possible, or reply to let us know if there is a problem with the invoice.

Payment details:
Bank transfer to IBAN GB00 0000 0000 0000
Reference: your invoice number

Already paid? Let us know with one click:
https://…/r/…

Kind regards,
Shirt Shop
Your own texts
On the Pro plan and during the free trial, Reminder settings has a section Your own reminder texts with one part for each of the 8 languages. Open a language and you see a Subject and a Message for each stage. Fill in both to replace the ready-made text for that stage and language, or leave both empty to keep it. A subject can be up to 200 characters and a message up to 3,000.
Your own texts are used only for invoices in that language. Invoices in other languages, and stages you leave empty, keep the ready-made text, so a reminder is always in one language from greeting to sign-off.
These placeholders are filled in for each invoice:
{customer}: the customer name{invoice}: the invoice number{amount}: the amount still to pay, with the currency{due_date}: the due date{days}: how many days overdue the invoice is, or 0 before the due date{business}: your business name
The greeting, payment link or details, “Already paid” link and sign-off are added automatically, so write only the message itself. For ideas, see our payment reminder email templates.
Your own 7-day or 30-day text is sent as you wrote it, even when it is the first reminder an invoice gets. Do not refer to earlier reminders in it.
On the Starter plan, the ready-made texts are always used. Texts you wrote during the trial or on the Pro plan are kept, and are used again if you move to Pro. Texts written before own texts were kept per language are filed under your Default reminder language.
Check before it goes out
What customers receive, at the bottom of Reminder settings, shows each stage for a made-up invoice. On each invoice, Preview the next reminder shows the real email for that customer, as it will be on the day it goes out.
Payment link and payment details
Each reminder tells your customer how to pay, in one of two ways:
- Payment link on the invoice: a Stripe, PayPal or bank payment link for this invoice, starting with
https://. Reminders show it under “Pay online:” and leave out your general payment details. - How customers can pay in Reminder settings: used for every invoice without its own link. Write your bank details and the reference to use, for example your IBAN and BIC, or your sort code and account number. Reminders show it under “Payment details:”.
If an invoice has no payment link and How customers can pay is empty, reminders have no payment section at all, so fill in at least one.
The tool does not create payment links or take payments. Create the link with your payment provider, then paste it into the invoice. A link for the exact amount of the invoice is easiest for your customer.
Attach the invoice PDF
Under Invoice PDF to attach on the invoice form, upload the invoice as a PDF of up to 2 MB. It is attached to every reminder for that invoice. To replace it, edit the invoice and choose a new file. To stop attaching it, edit the invoice, tick Remove the attached PDF and click Save changes. You can download it from the invoice page, next to Attached PDF.
Add an invoice
The same steps in pictures:
-
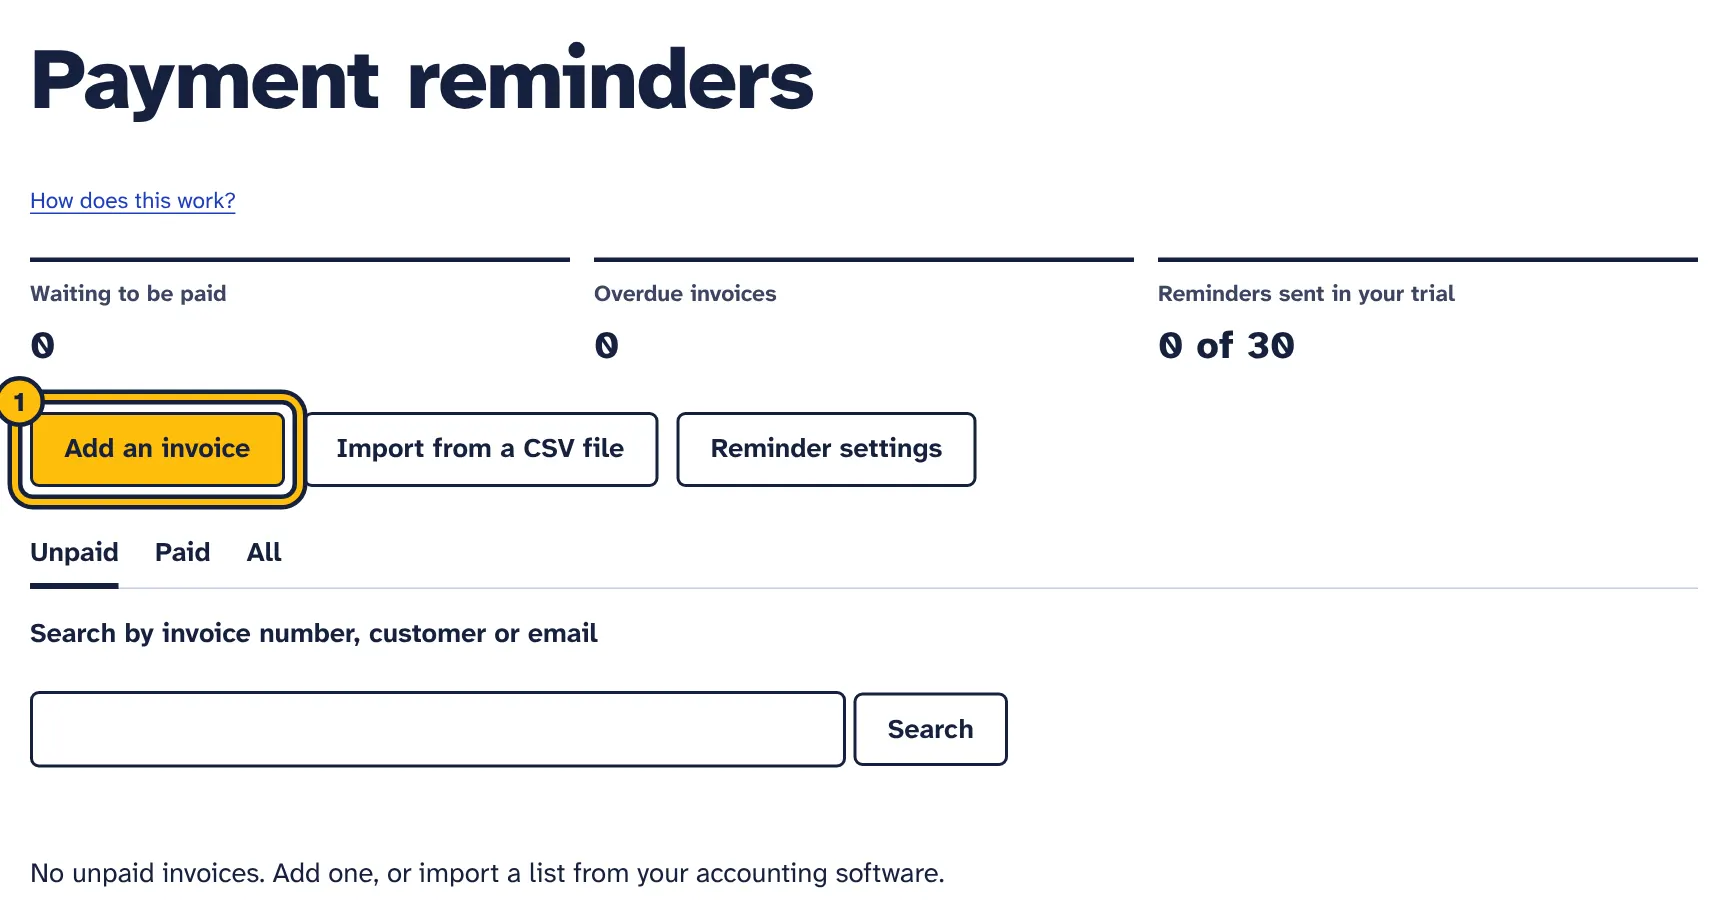
Step 1: Click Add an invoice. -
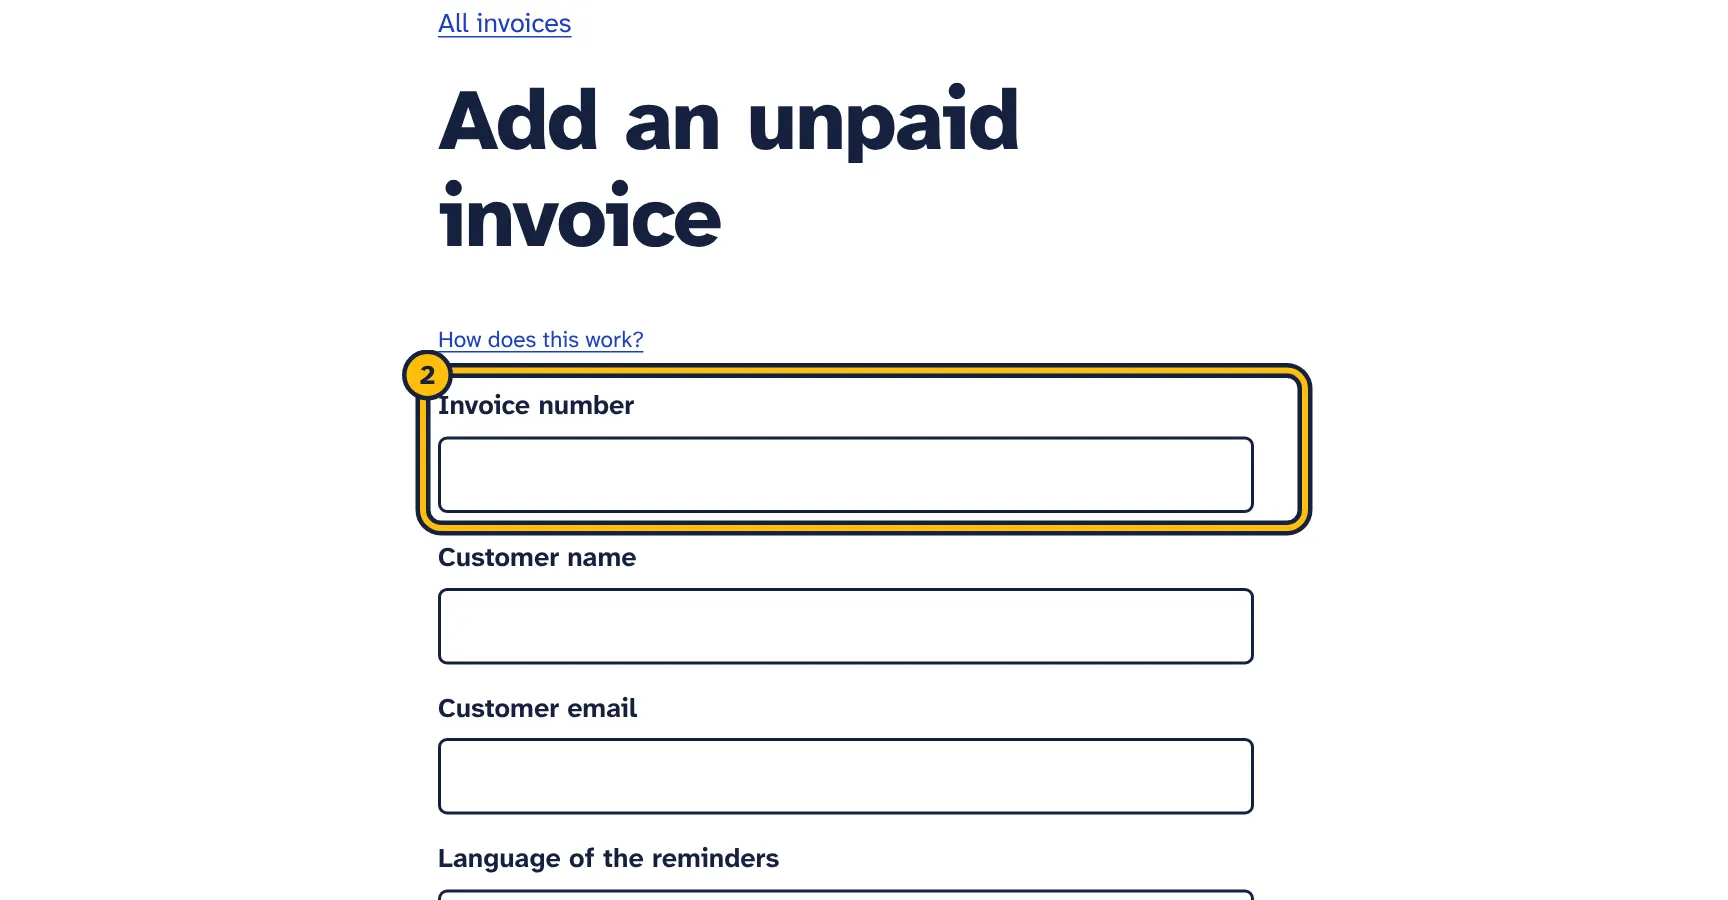
Step 2: Type the invoice number. -
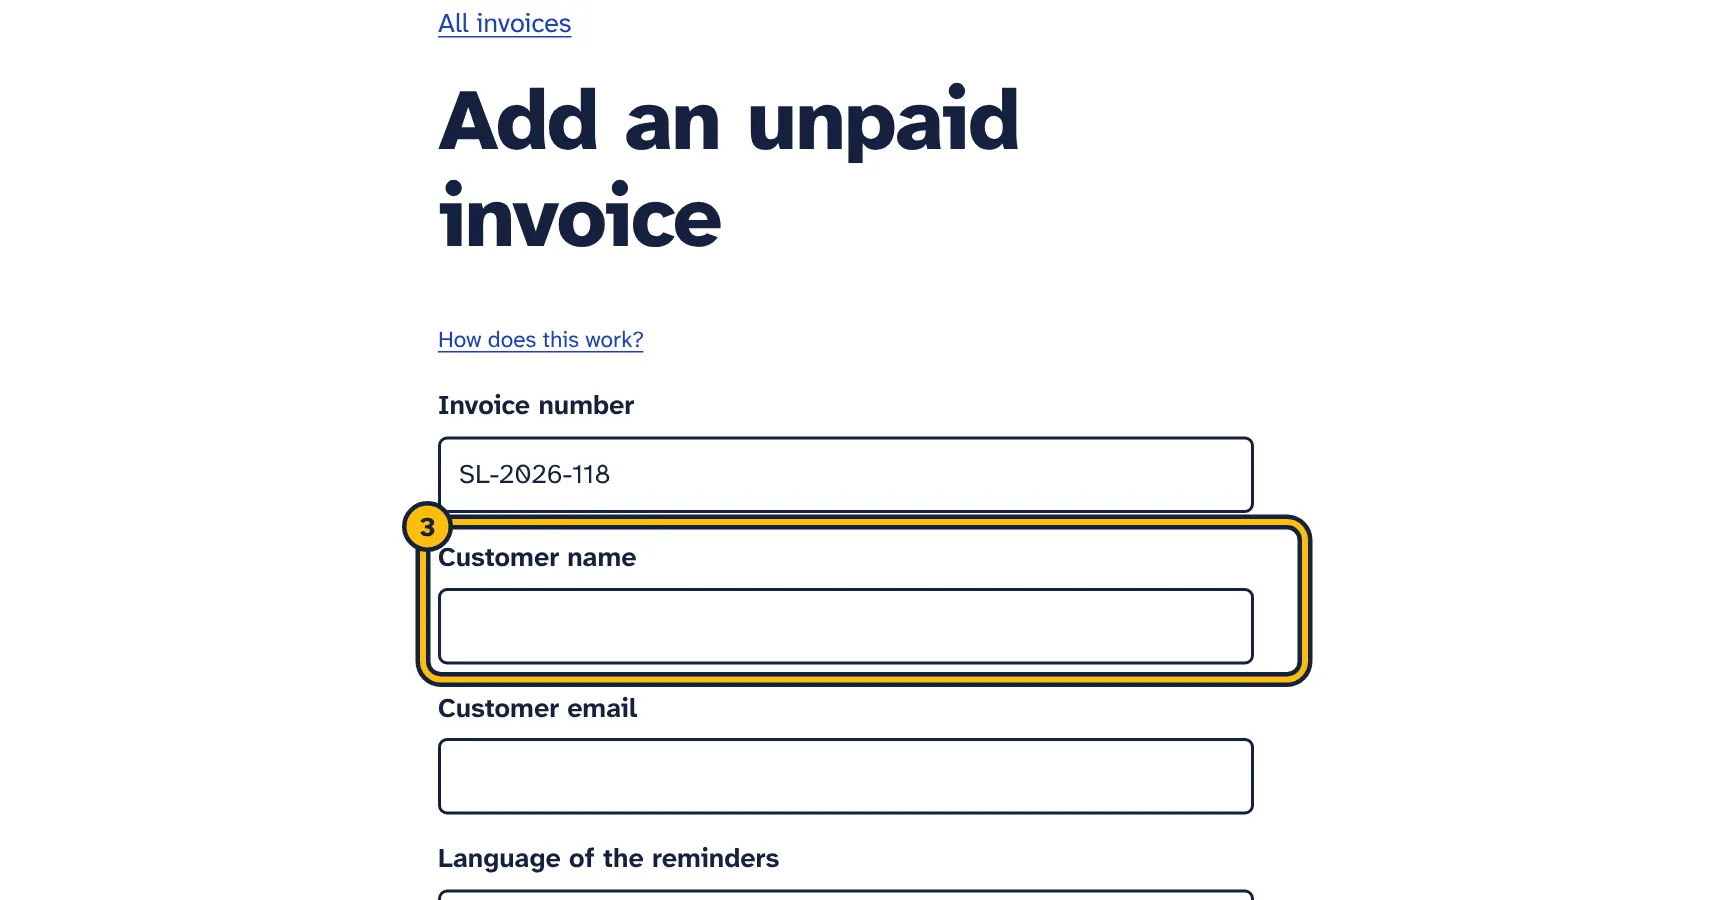
Step 3: Type your customer’s name… -
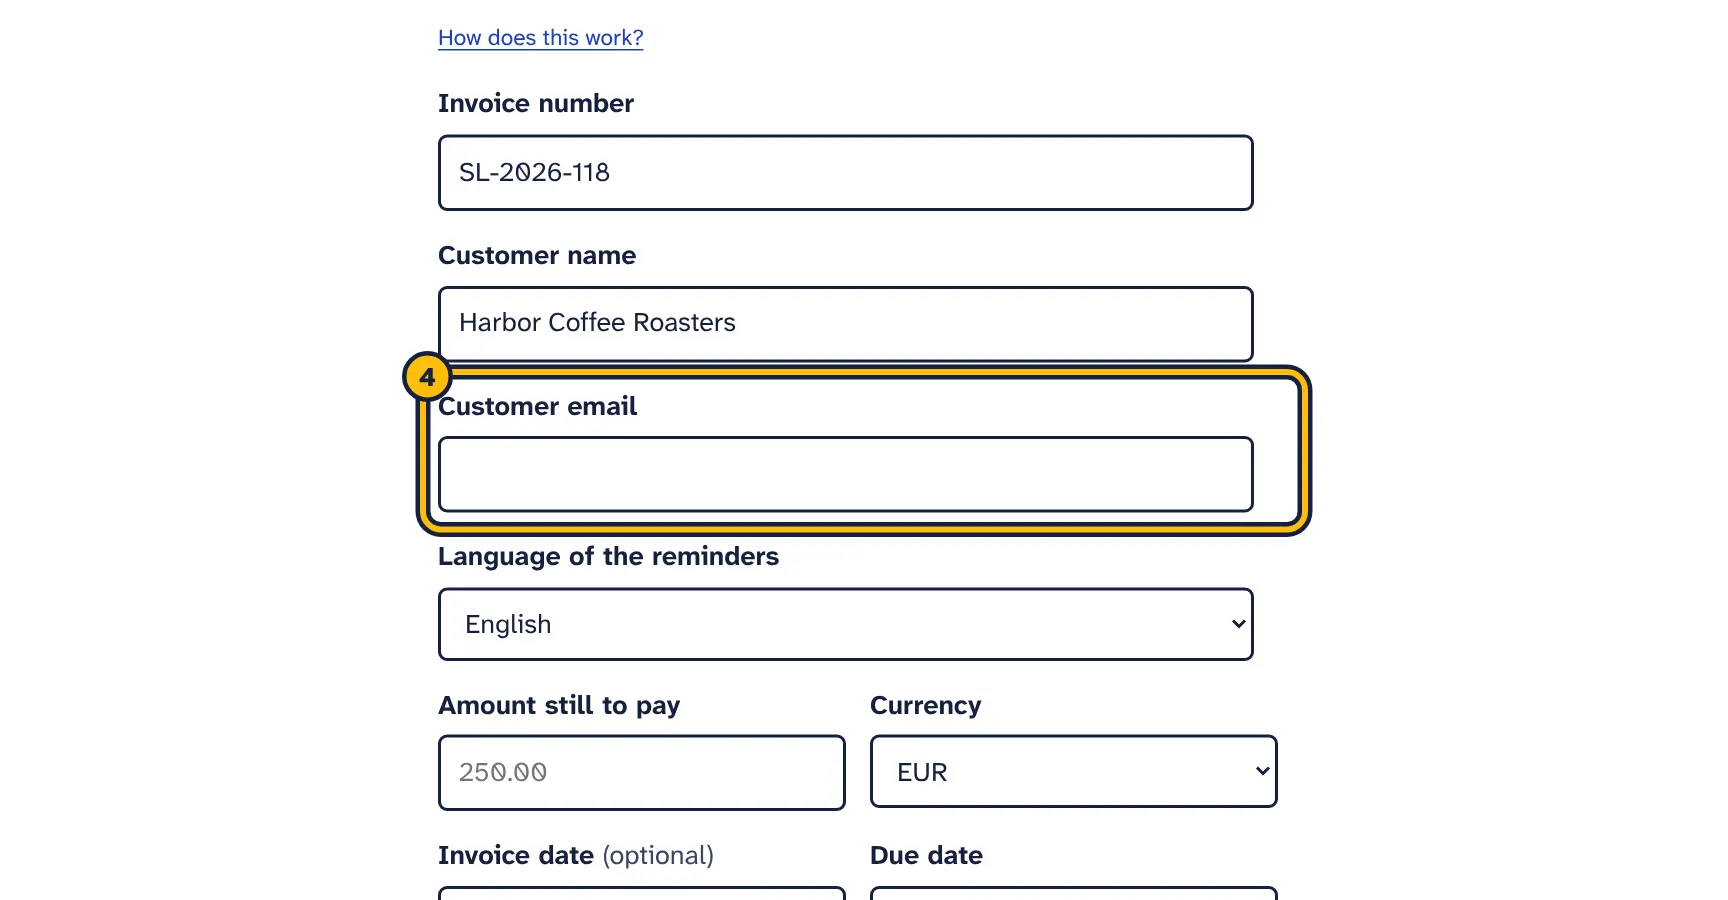
Step 4: …and the email address the invoice went to. -
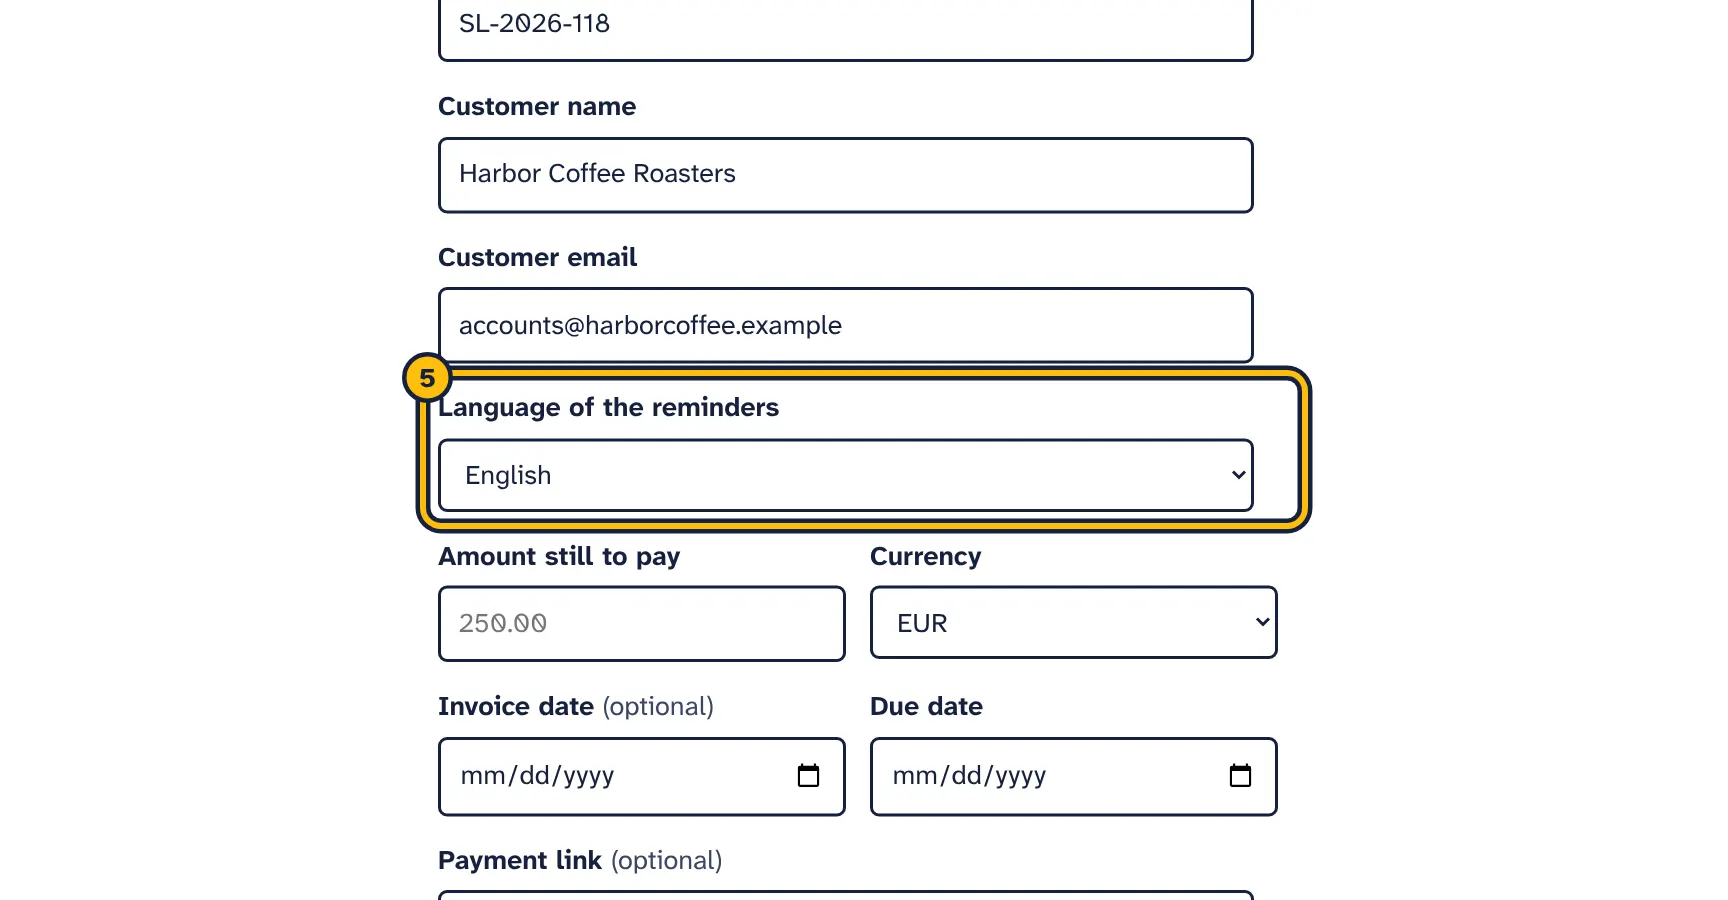
Step 5: Choose the language your customer reads. -
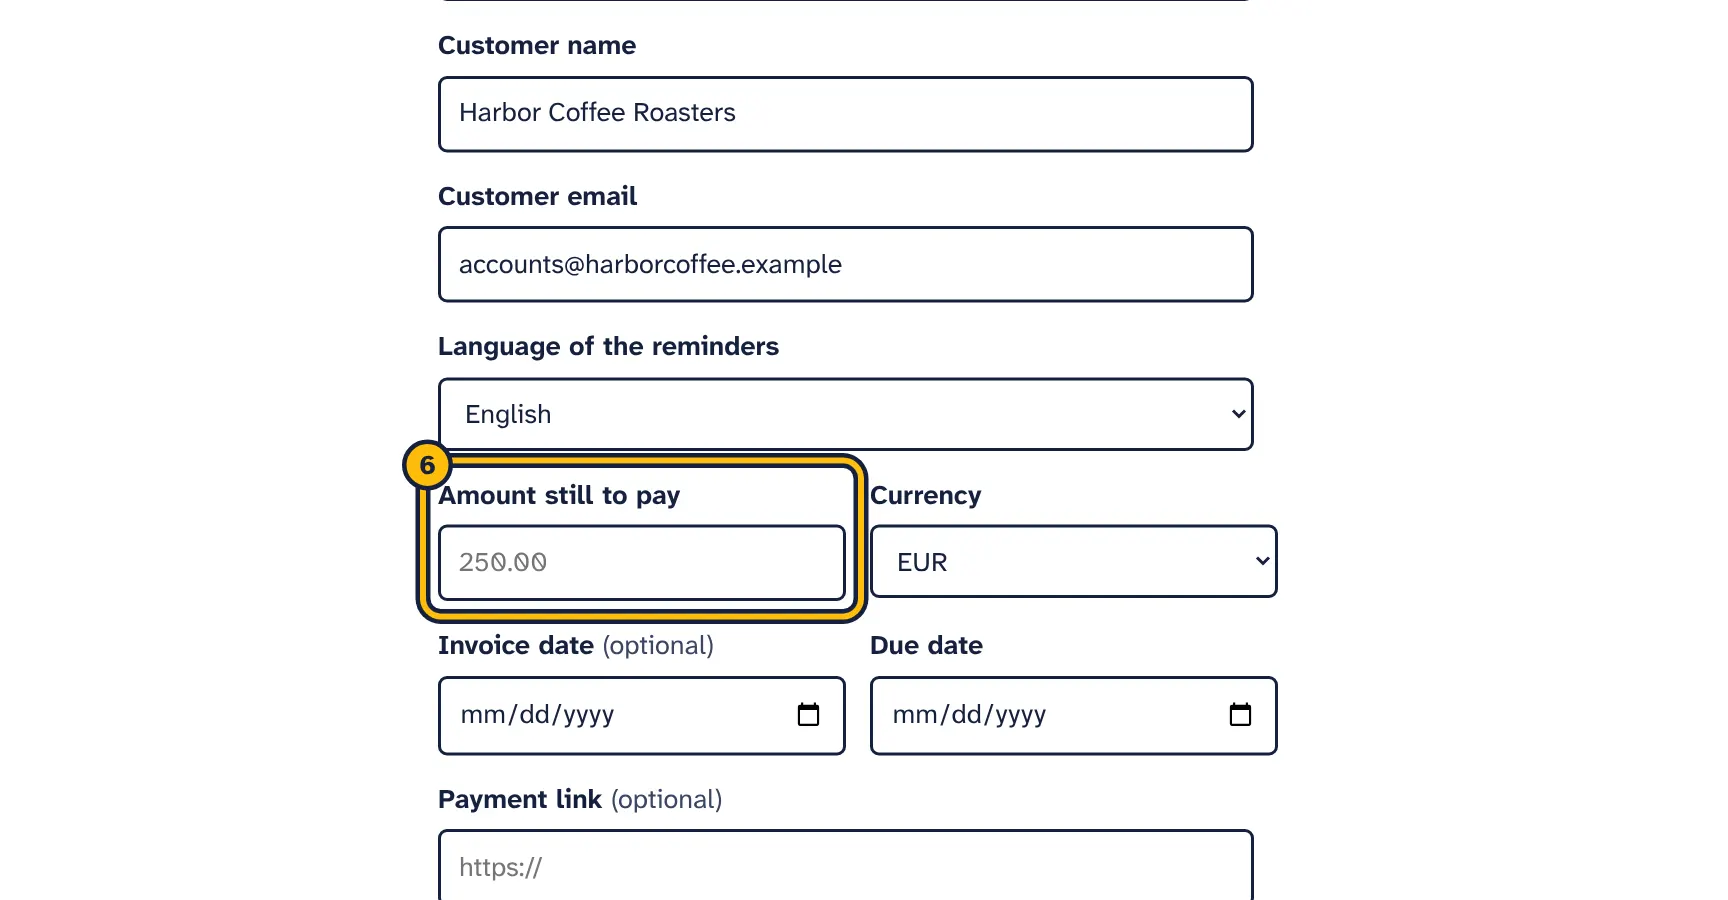
Step 6: Type the amount still to pay. -
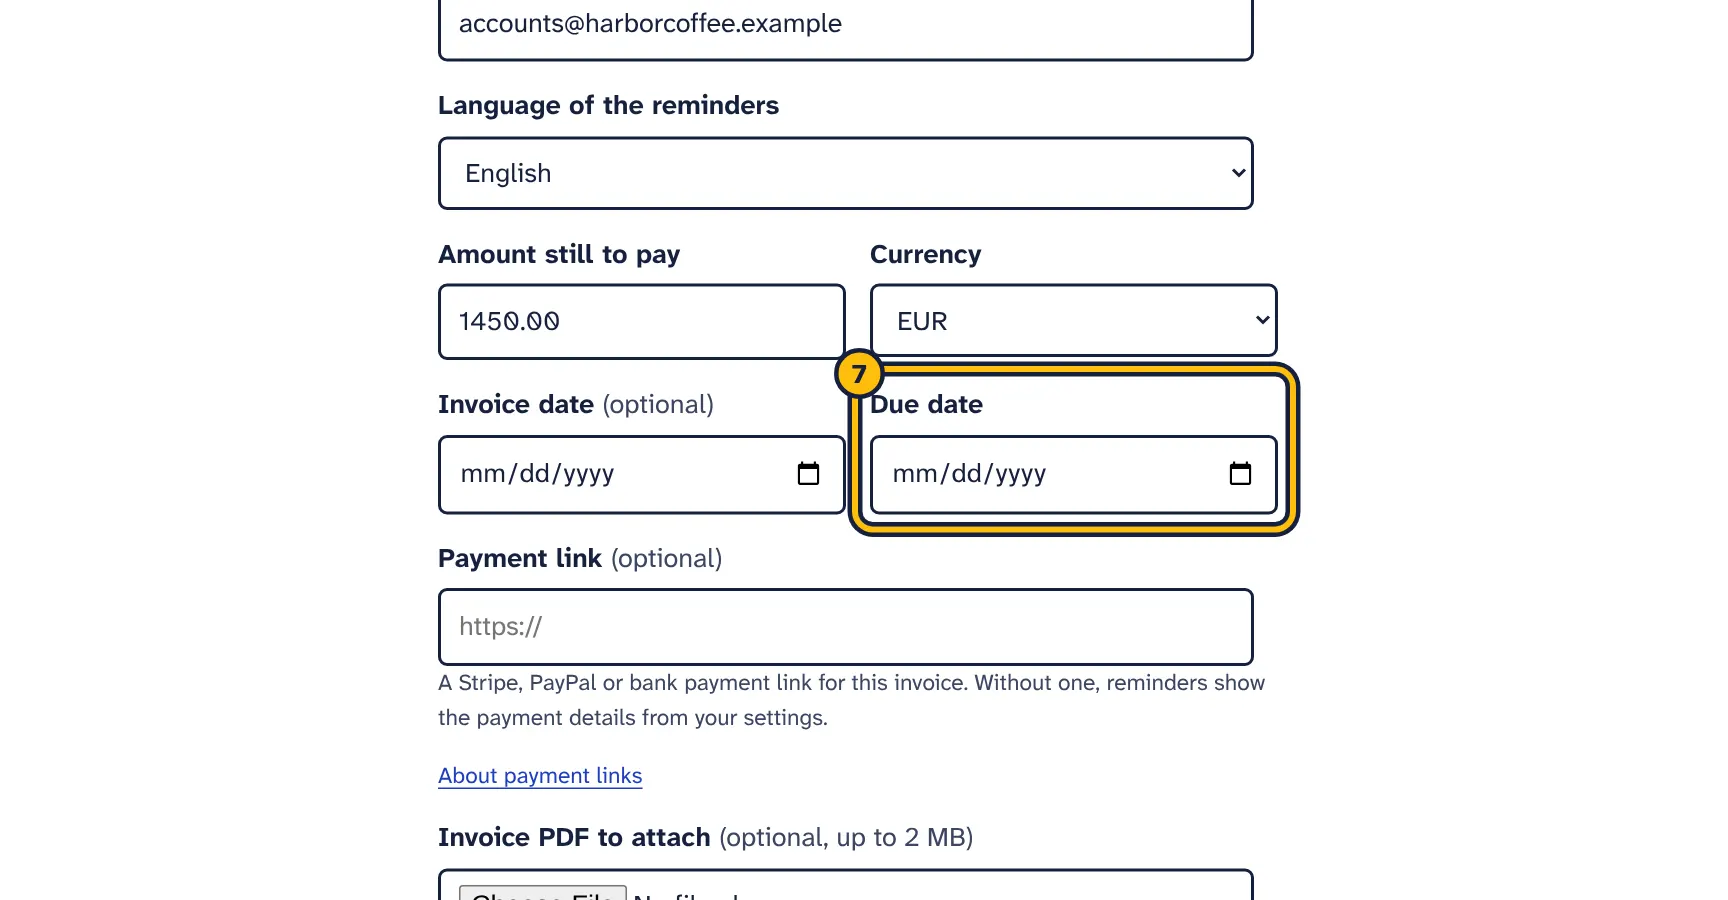
Step 7: Choose the due date from the invoice. -
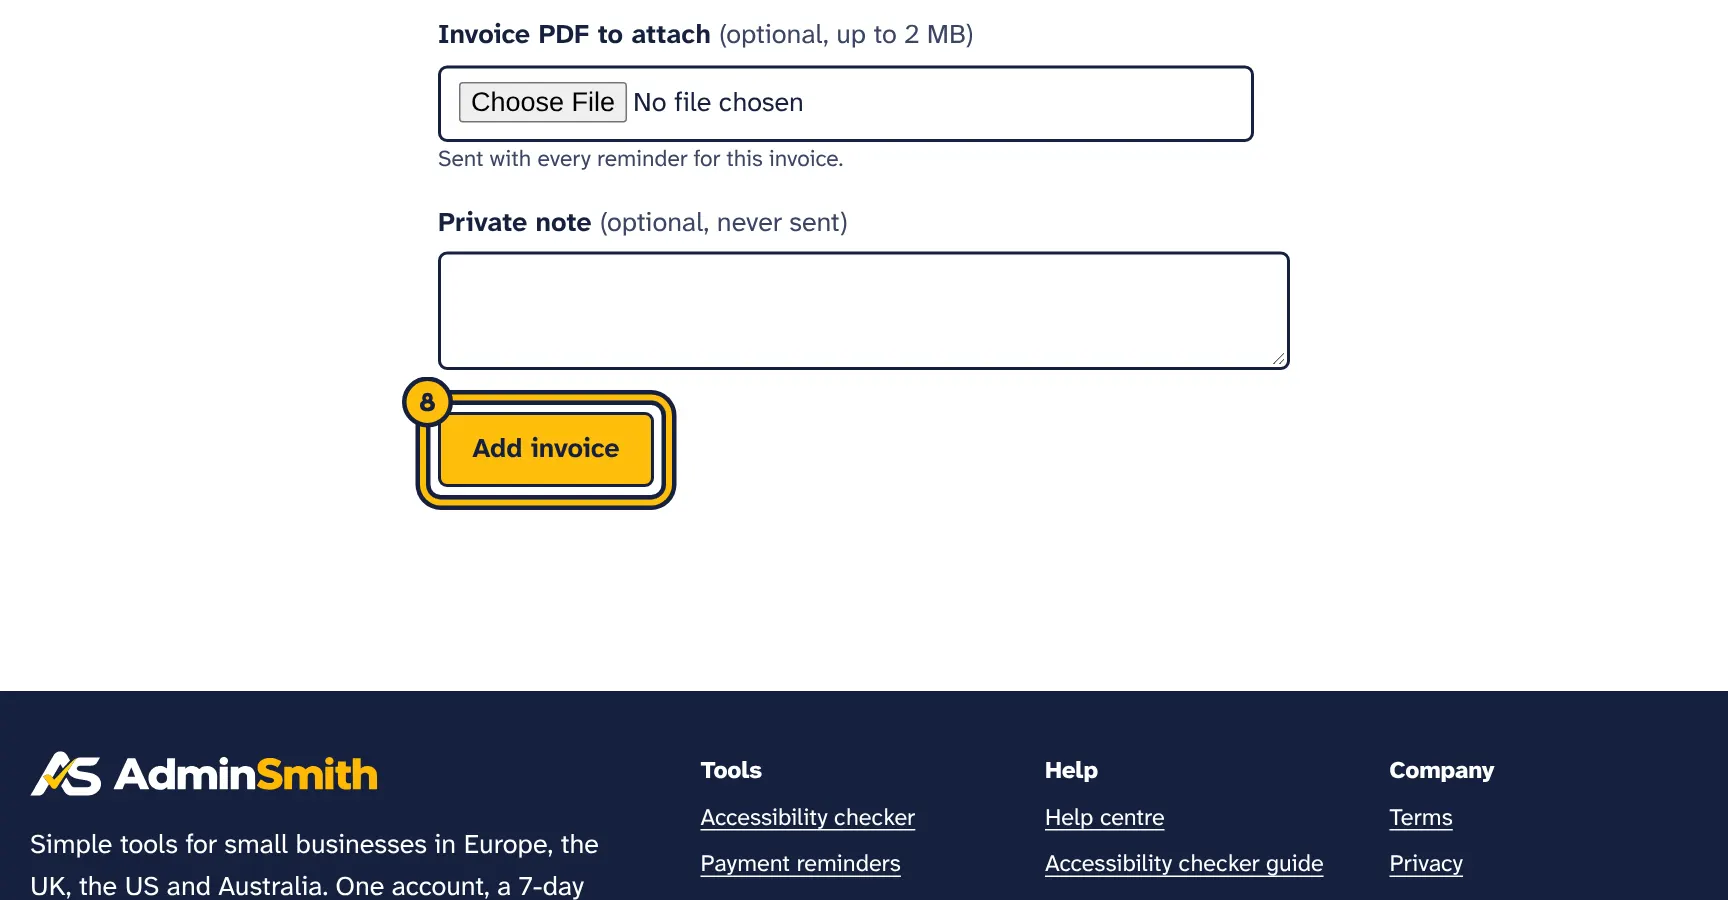
Step 8: Click Add invoice. -
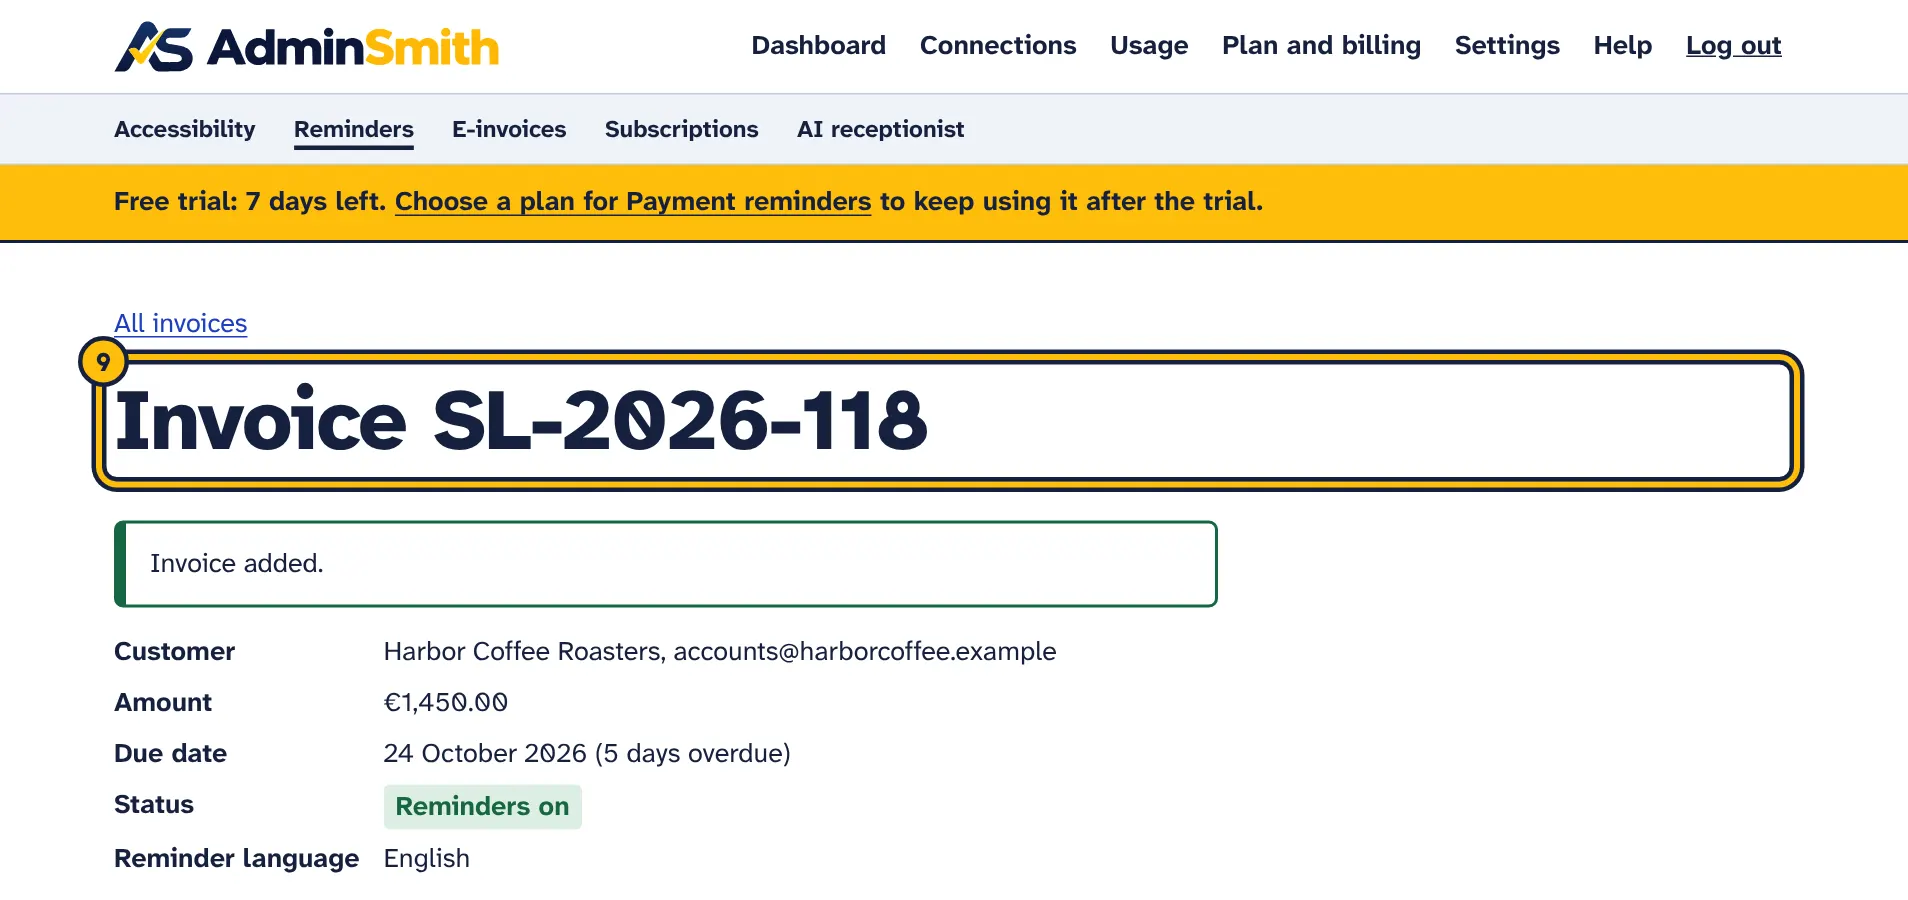
Step 9: The invoice is on your list with the date of its next reminder.
In Payment reminders, click Add an invoice. The form Add an unpaid invoice has these fields:
- Invoice number
- Required, up to 60 characters. Each number can be in your list only once, including paid invoices.
- Customer name
- Required. Used in the greeting, so a contact person’s name makes reminders more personal.
- Customer email
- Required. One email address that receives the reminders.
- Language of the reminders
- One of the 8 languages. Starts with your Default reminder language.
- Amount still to pay
- Required. The amount outstanding, which may be less than the invoice total if part has been paid. Both
1250.00and1250,00work. - Currency
- Starts with your Default currency. The list has 15 common currencies; any other three-letter currency code can be imported from a CSV file.
- Invoice date
- Optional, for your records. It is not shown in reminders.
- Due date
- Required. The reminder schedule is counted from this date.
- Payment link
- Optional. A secure link starting with
https://where your customer can pay this invoice; links starting withhttp://are not accepted. See Payment link and payment details. - Invoice PDF to attach
- Optional, a PDF file of up to 2 MB. Sent with every reminder for this invoice. When you edit an invoice that has a PDF, you can also tick Remove the attached PDF.
- Private note
- Optional, up to 1,000 characters. Only you see it, on the invoice page; it is never sent.
Click Add invoice. The invoice page opens with “Invoice added.” and the date of its next reminder.
If the form shows an error
- “Invoice … is already in your list.” Use another number, or open the invoice that is already there.
- “Your plan allows … unpaid invoices at a time.” Mark paid invoices as paid, delete ones you no longer need, or upgrade your plan.
- “Enter a valid email address for the customer.” Check for typos and spaces; only one address is allowed.
- “Enter the amount still to be paid, for example 250.00.” The amount must be a number above zero.
- “The payment link must start with https://.” Copy the full, secure link from your payment provider.
- “This type of file is not supported here.” Only PDF files can be attached.
- “The file is too large. The limit is 2 MB.” Save the PDF in a smaller size, for example without high-resolution images.
When your trial has ended and you have no plan, Add an invoice is hidden and new invoices cannot be added.
Import invoices from a CSV file
The same steps in pictures:
-
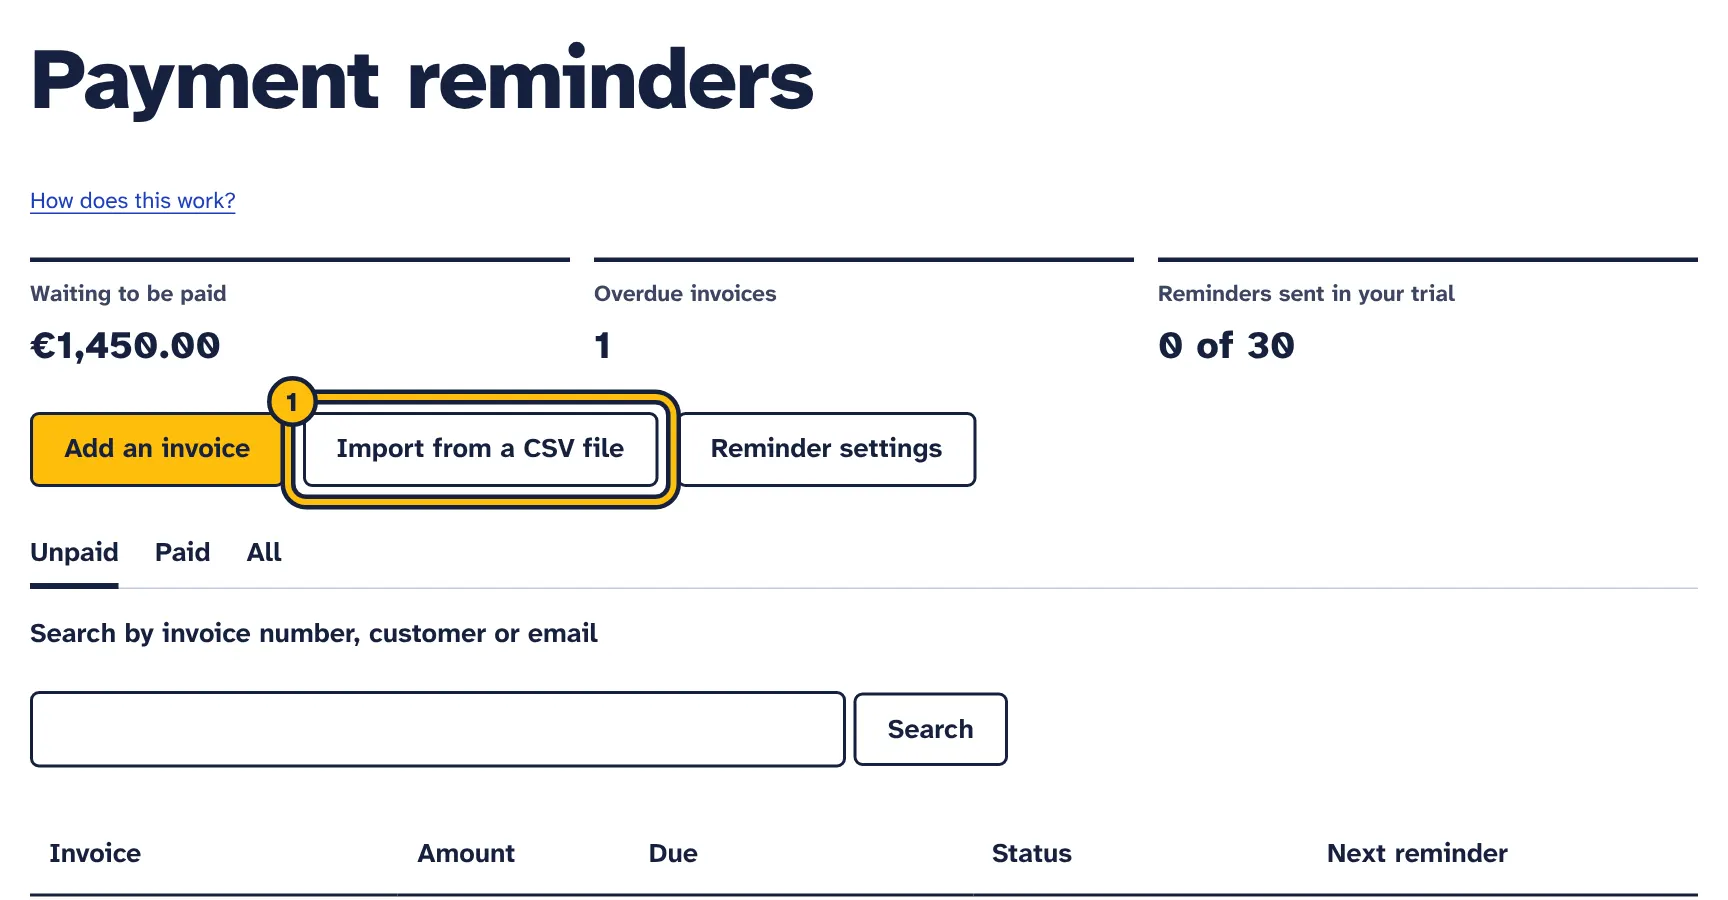
Step 1: Click Import from a CSV file. -
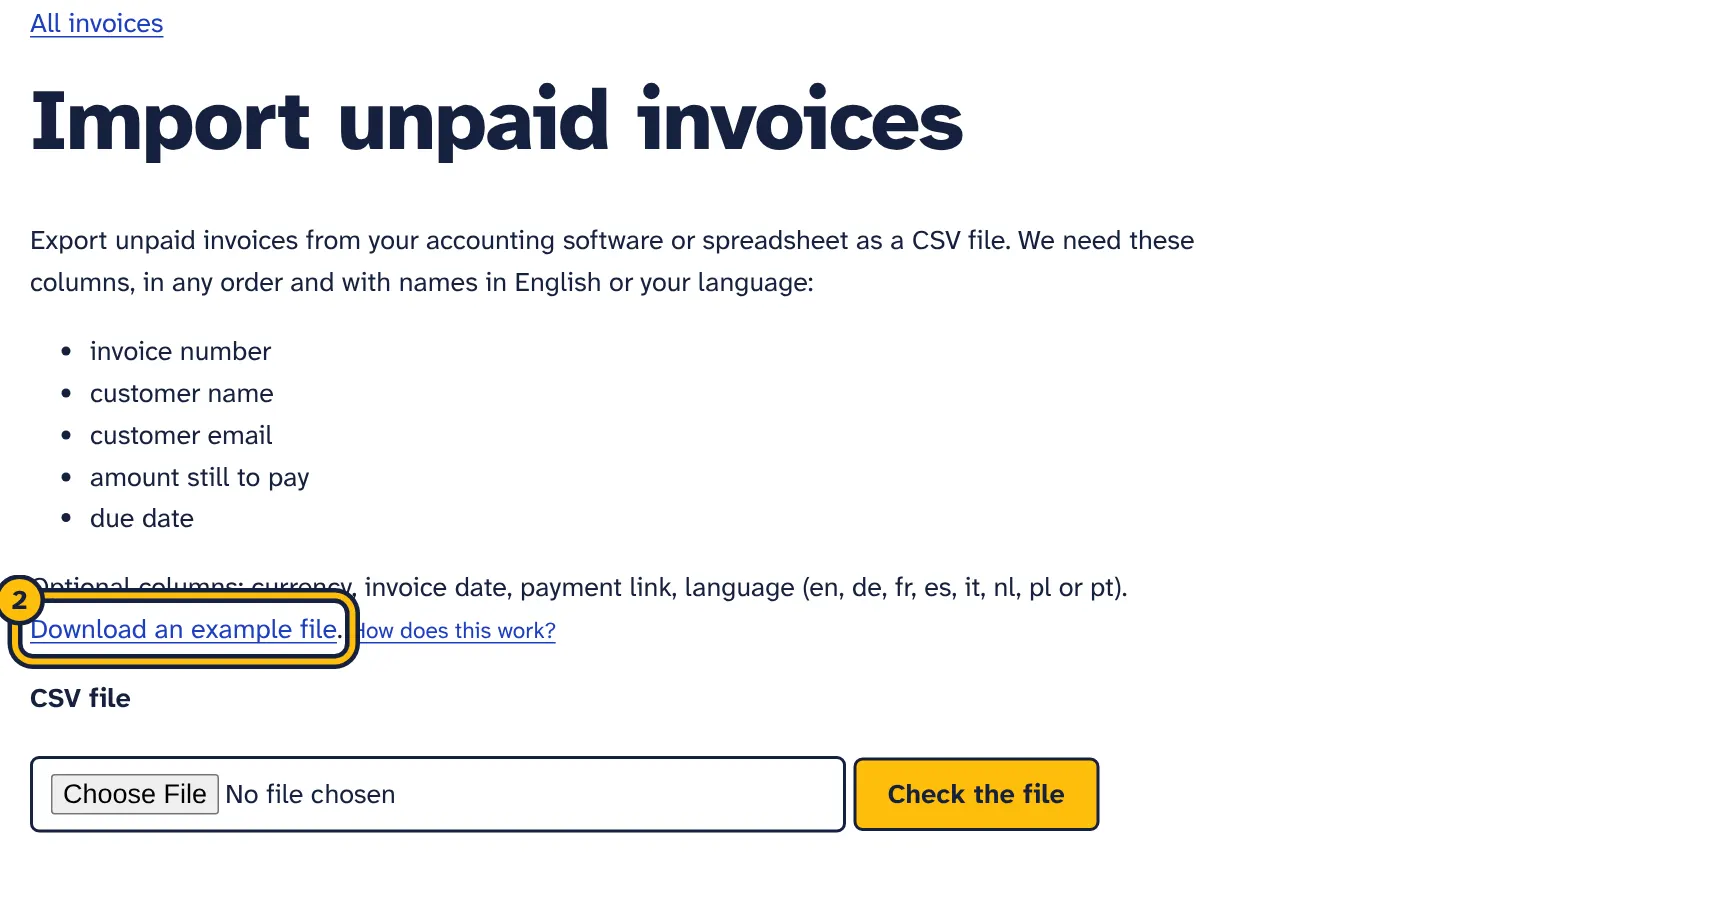
Step 2: Not sure about the columns? Download the example file and fill it in. -
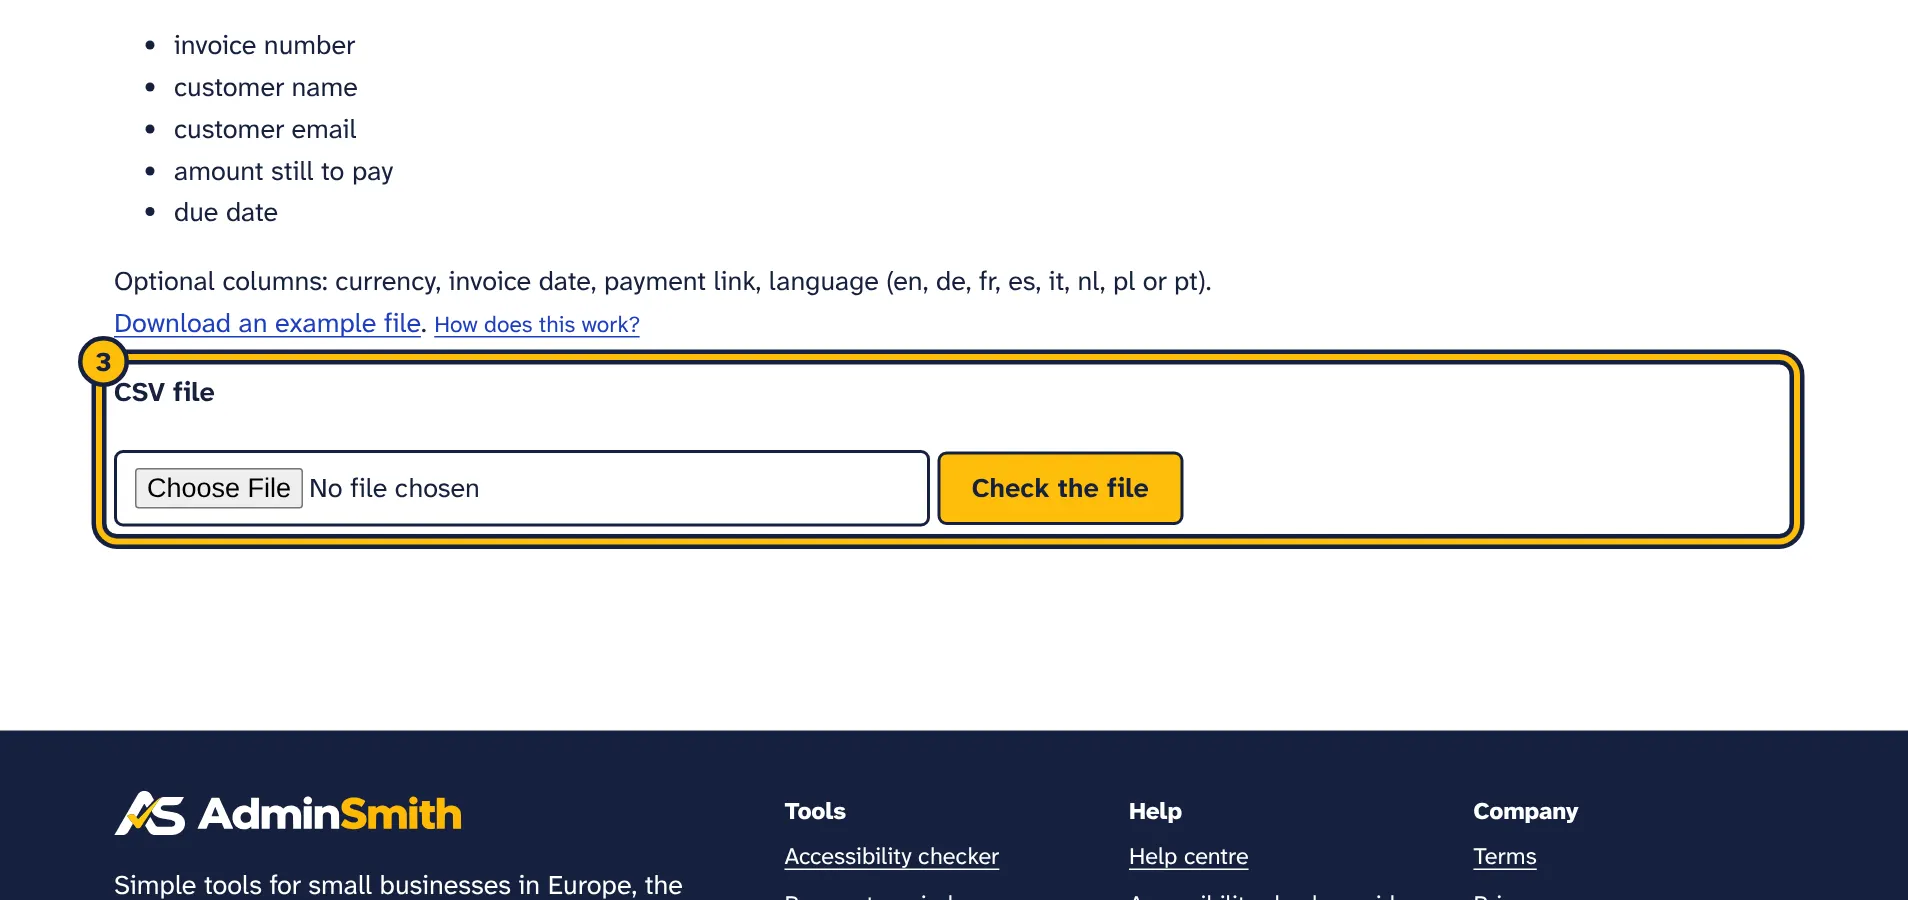
Step 3: Choose your CSV file, exported from your accounting software or spreadsheet. -
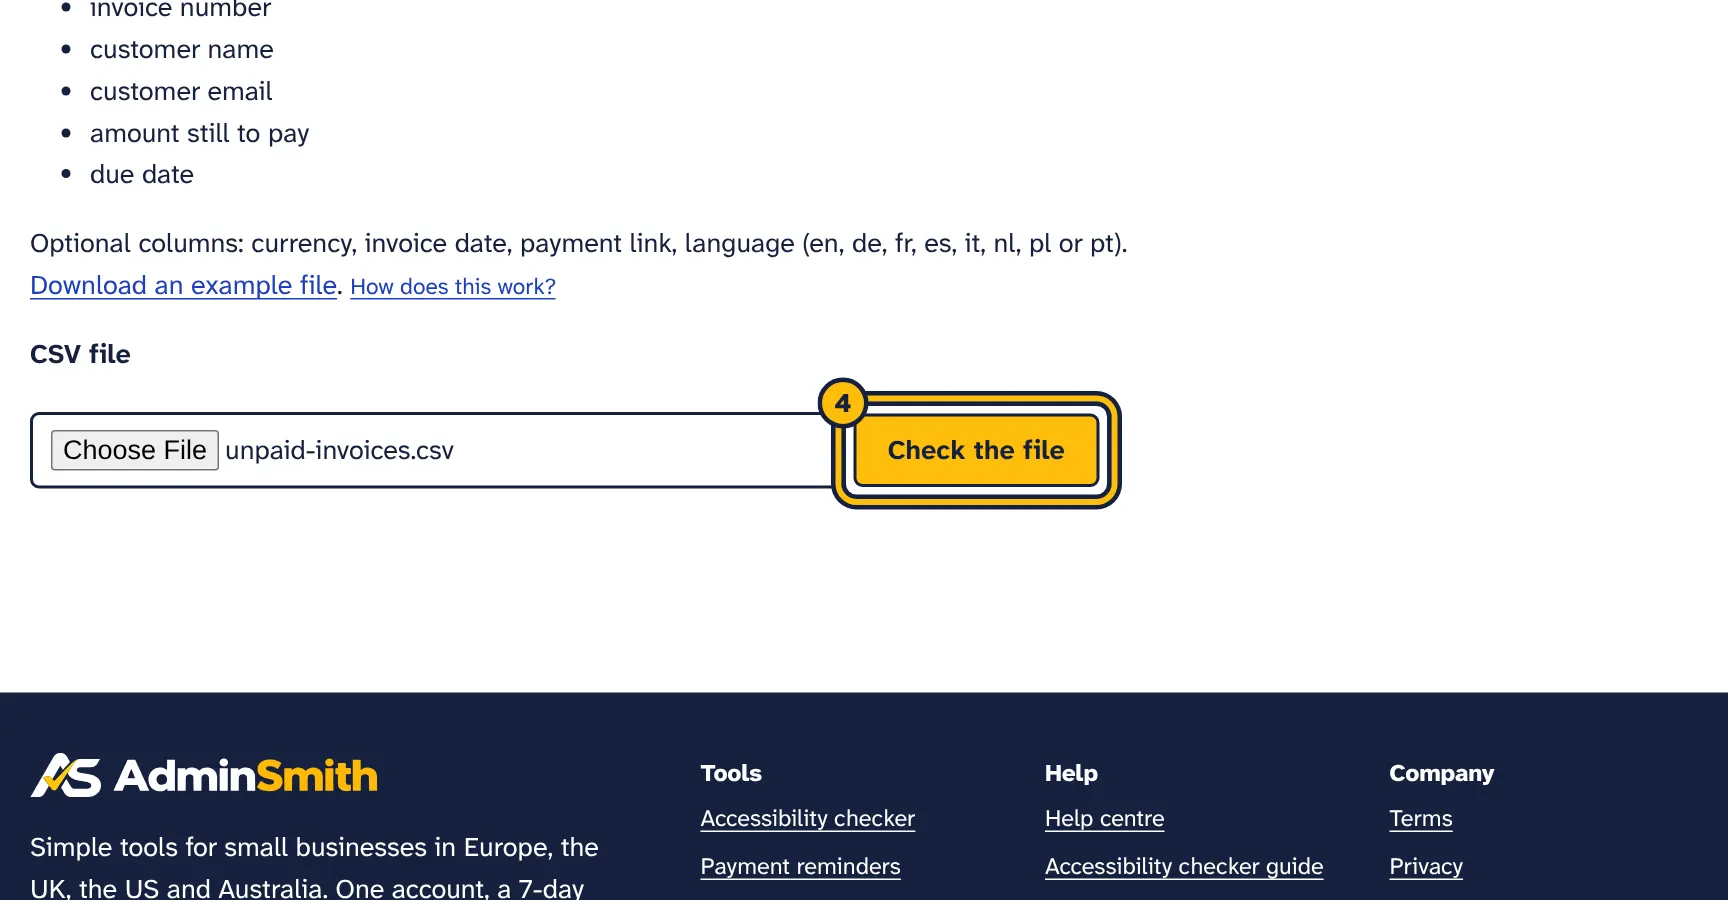
Step 4: Click Check the file. -
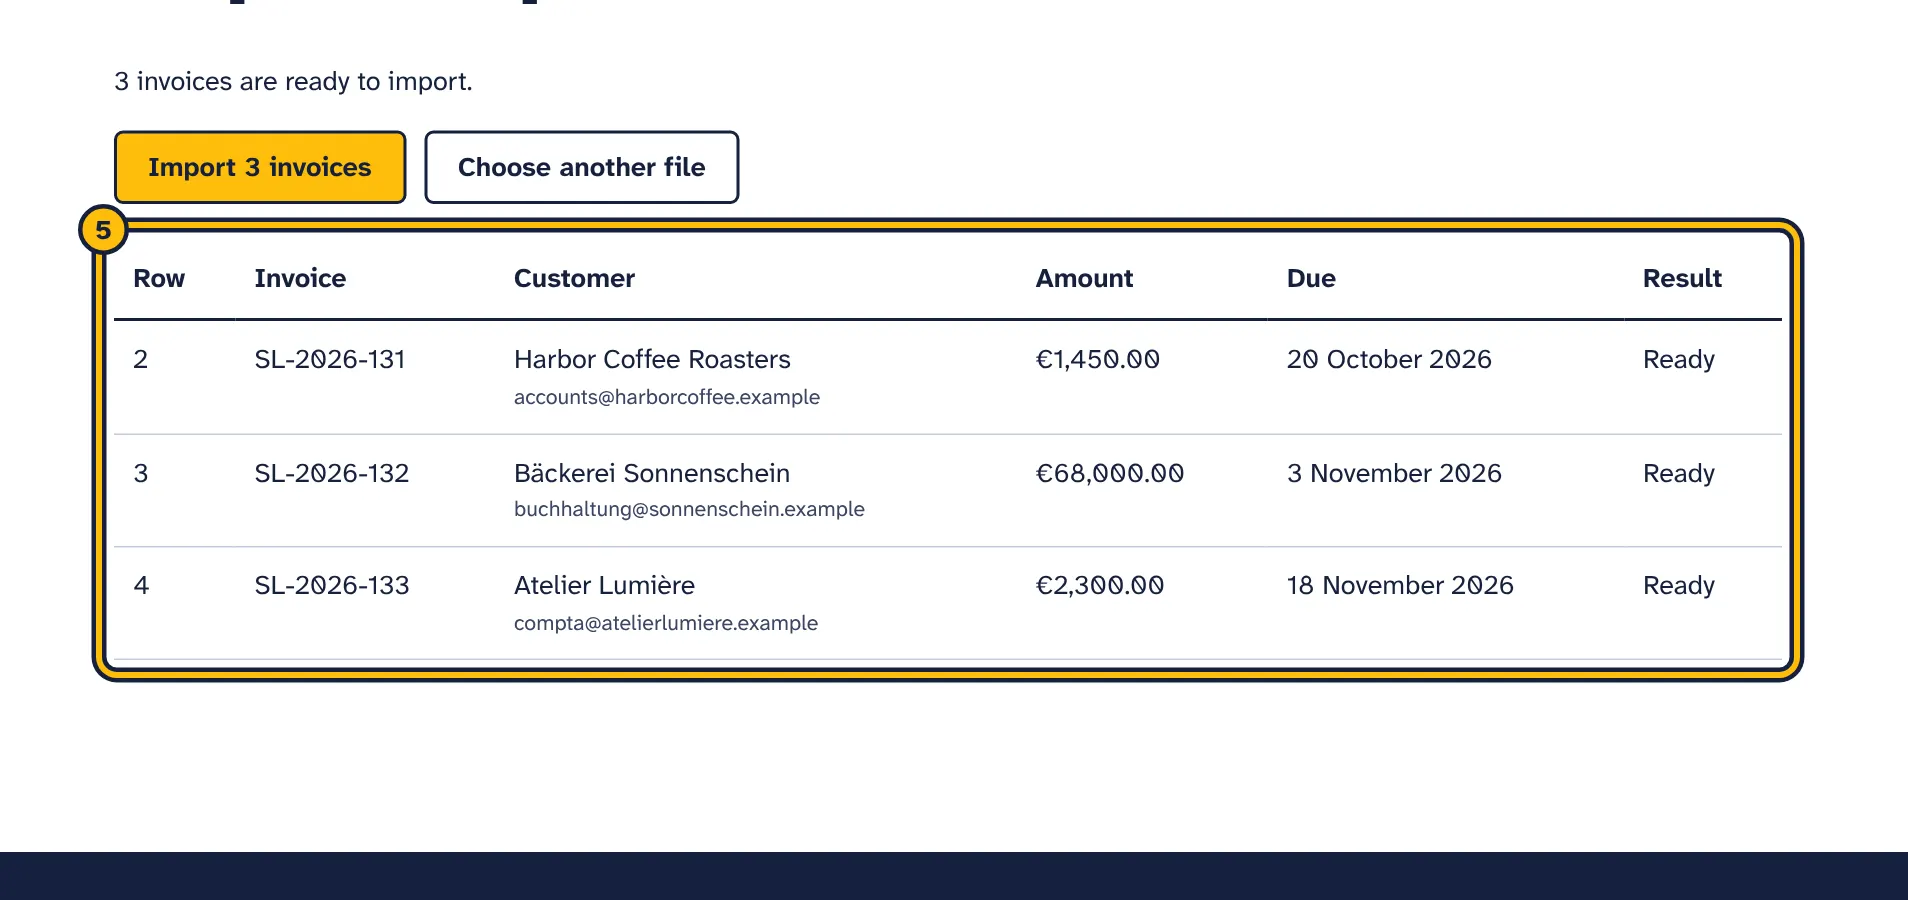
Step 5: Check the list. Rows with a problem are shown with what to fix. -
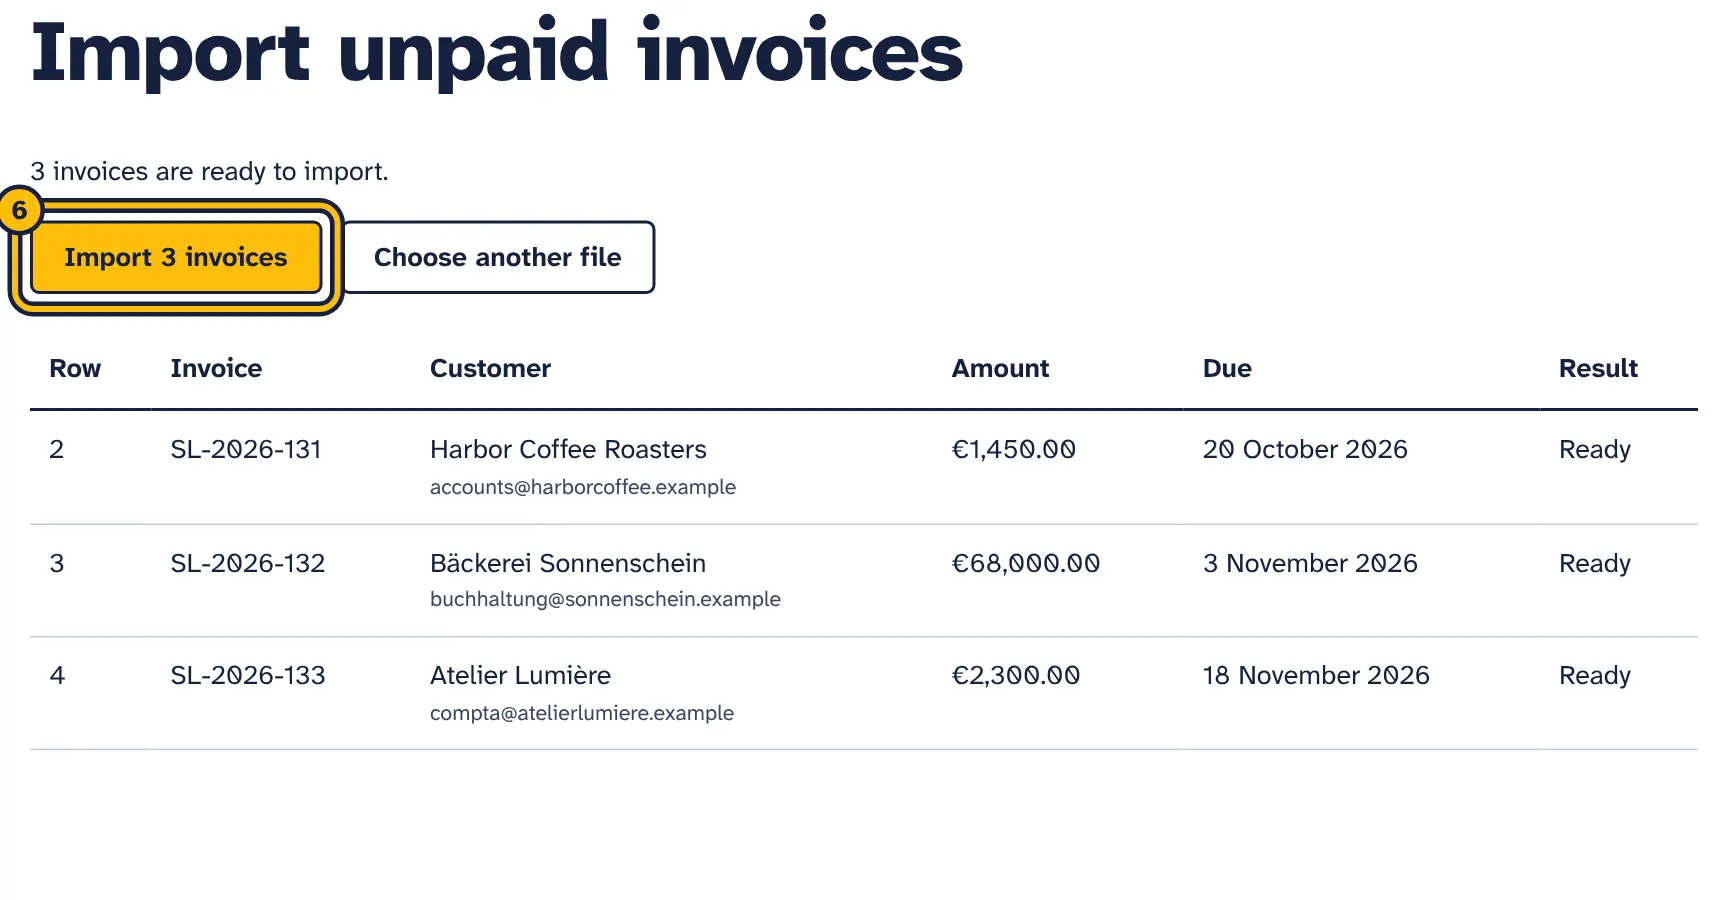
Step 6: Click Import to add the invoices.
To add many invoices at once, export your unpaid invoices from your accounting software or spreadsheet as a CSV file. In Payment reminders, click Import from a CSV file.
- If you want a template, click Download an example file and fill it in.
- Under CSV file, choose your file and click Check the file.
- Read the preview. It says how many invoices are ready, how many rows have a problem and how many are already in your list, and shows each row with Ready, Already in your list or the reason it will be skipped.
- Click the import button, for example Import 25 invoices, or click Choose another file to fix your file first.
Nothing is imported until you click the import button. A preview stays valid for an hour and can be used once; after that, upload the file again.
Columns
Your file needs a header row, and the columns can be in any order. Header names are matched without regard to capital letters, accents or punctuation, and letters such as ł, ø and ß count as l, o and ss. A header that contains one of the names also counts, so Amount due (EUR) is read as the amount. These columns are required:
- Invoice number
- For example
Invoice number,Invoice no,Invoice #,Number,Reference,Rechnungsnummer,Facture,Factura,Fattura,Factuurnummer,Numer fakturyorFatura. - Customer name
- For example
Customer name,Client name,Customer,Client,Company,Name,Kunde,Cliente,Klant,KlientorNazwa. - Customer email
- For example
Email,E-mail,Mail,Customer email,Client email,CourrielorCorreo. - Amount still to pay
- For example
Amount due,Balance due,Outstanding,Open amount,Amount,Total,Balance,Betrag,Montant,Importe,Importo,Bedrag,KwotaorValor. - Due date
- For example
Due date,Due,Payment due,Fällig,Fälligkeit,Échéance,Vencimiento,Scadenza,Vervaldatum,Termin płatnościorVencimento.
These columns are optional:
- Currency
- A three-letter code such as
EUR,USDorGBP, in a column such asCurrency,CCY,Währung,Devise,Moneda,Valuta,WalutaorMoeda. Without it, an amount written like1.250,00 EURstill gives the currency; otherwise your Default currency is used. - Invoice date
- In a column such as
Invoice date,Issue date,Date issued,Date,Rechnungsdatum,Datum,FechaorData. - Payment link
- In a column such as
Payment link,Pay link,Payment URL,LinkorURL. It must start withhttps://. - Language
- A two-letter code:
en,de,fr,es,it,nl,plorpt, in a column such asLanguage,Lang,Sprache,Langue,Idioma,Lingua,TaalorJęzyk. Other values use your Default reminder language.
If your export has both a total and an amount still due, name the column with the amount still to pay Amount due or Balance due, or remove the total column, so the right one is used.
Amounts, dates and file format
- Separators: comma, semicolon, tab or vertical bar, detected automatically.
- Text encoding: UTF-8, or the Windows encoding Excel often uses. Accented letters are kept.
- Amounts:
1250.00,1,250.00,1.250,00,1 250,00and€ 1.250,00all work. Whether the comma or the point is the decimal separator is worked out from the whole column. - Dates:
2026-10-31,31.10.2026,31/10/2026,10/31/2026,20261031,31 Oct 2026andOct 31, 2026. Two-digit years count as 20xx. - Day or month first: the tool works it out from the dates in the file. If it cannot tell, it reads the day first, so
03/04/2026means 3 April. To be safe, use theYYYY-MM-DDformat. - Size: up to 1 MB and 2,000 invoice rows per file. If your file has more rows, the preview tells you how many were skipped, so you can import them from a second file. The preview lists the first 200 rows.
- Excel workbooks (.xlsx) cannot be read. Save or download your sheet as CSV first.
What is skipped
- Rows with a problem, such as a missing or invalid email address or an unreadable date. The preview shows the reason for each.
- Invoice numbers that are already in your list, paid or unpaid, and repeats within the file. Of two rows with the same number, the first is imported.
- Invoices beyond your plan’s room for unpaid invoices. The preview says how many fit, and only the first ones are imported.
If the page says “We could not find these columns: …”, it names the missing columns, for example Customer email or Due date. Rename those headers in your file, or start from the example file. A file with only a header row, or none, gets the message “This file has no invoices.”
After the import
The invoice list shows “Imported … invoices.” Imported invoices have no PDF or private note; edit an invoice to add them. Invoices that are already overdue get one reminder in the next sending window, for the most recent stage they have reached; if that is the 7-day or 30-day stage, it is worded as a first notice. Look at the Next reminder column straight after importing, and pause any invoice you want to handle yourself.
Reminders for invoices made with E-invoices
If you create invoices with our E-invoices tool, open an issued invoice there and click Send payment reminders for this invoice. It is added to Payment reminders with its number, customer name and email, amount payable, currency, invoice date and due date, and a PDF copy is attached. If the e-invoice has no due date, the due date is set to 14 days after the invoice date. The invoice’s language is used if it is one of the 8 reminder languages; otherwise English.
No payment link is added, so reminders show your How customers can pay details. The private note says “Created from an e-invoice”. Afterwards, the button on the e-invoice changes to See its payment reminders.
- The e-invoice must include the customer’s email address.
- Payment reminders needs an active trial or plan with room for another unpaid invoice.
- The invoice number must not be in Payment reminders already.
Your invoice list
Click Payment reminders to see your invoices. At the top you see:
- Waiting to be paid: the total of all unpaid and paused invoices, for each currency.
- Overdue invoices: how many unpaid invoices are past their due date.
- Reminders sent this month, or in your trial: how many reminders have been sent, out of your plan’s allowance.
Below are the buttons Add an invoice, Import from a CSV file and Reminder settings, and the tabs Unpaid, Paid and All. Unpaid invoices are sorted by due date, earliest first; paid ones by the date they were marked as paid; All by due date, latest first.
To find an invoice, type part of its number, the customer name or the email address under Search by invoice number, customer or email and click Search. The search applies to the tab you are on; click Clear search to see everything again. Each page shows 50 invoices; when there are more, “Showing 1–50 of …” appears below the list with Next page and Previous page.
- Invoice
- The invoice number and customer. Click the number to open the invoice.
- Amount
- The amount still to pay.
- Due
- The due date and where it stands, such as “Due in 5 days”, “Due tomorrow”, “Due today” or “3 days overdue”.
- Status
- Reminders on, Paused, Customer says paid or Paid.
- Next reminder
- “Today” or a date, with the stage, or None planned.
If something stops reminders from going out, a box headed Before reminders can go out tells you what to do: connect your email or choose a plan. Until you have saved your settings, a second box shows the sending hours and the time zone in use, for example “Reminders go out between 09:00 and 18:00, Europe/Berlin time (taken from your browser)”, with a link to Check the send time and time zone.
Manage an invoice
The same steps in pictures:
-
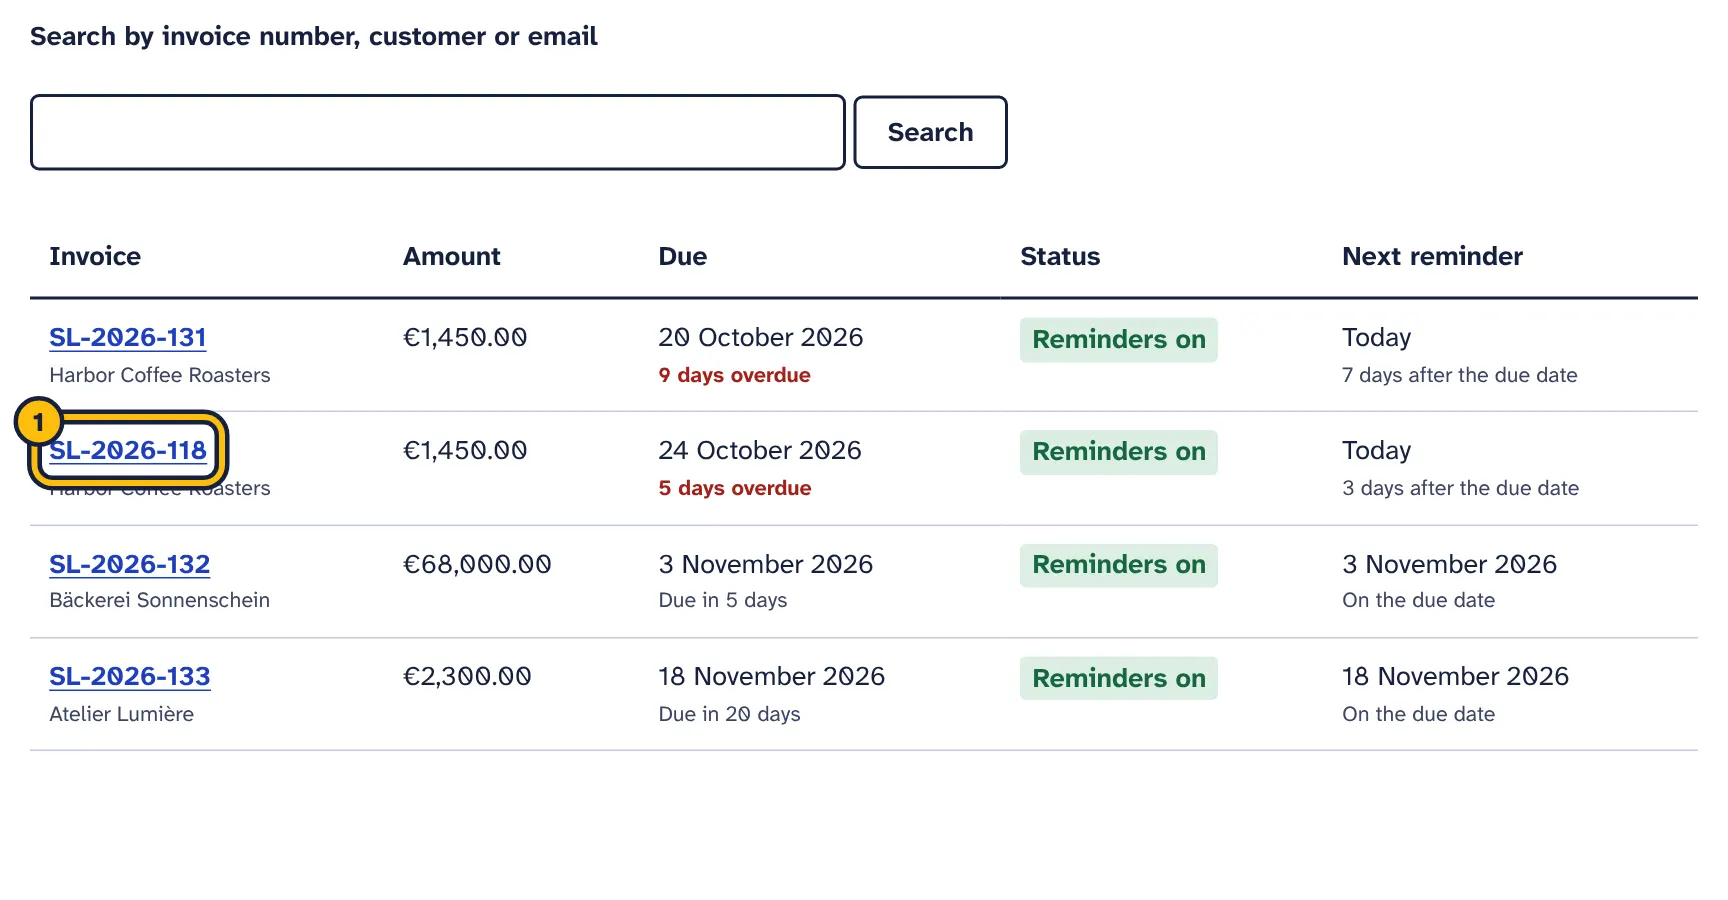
Step 1: Click the invoice number to open it. -
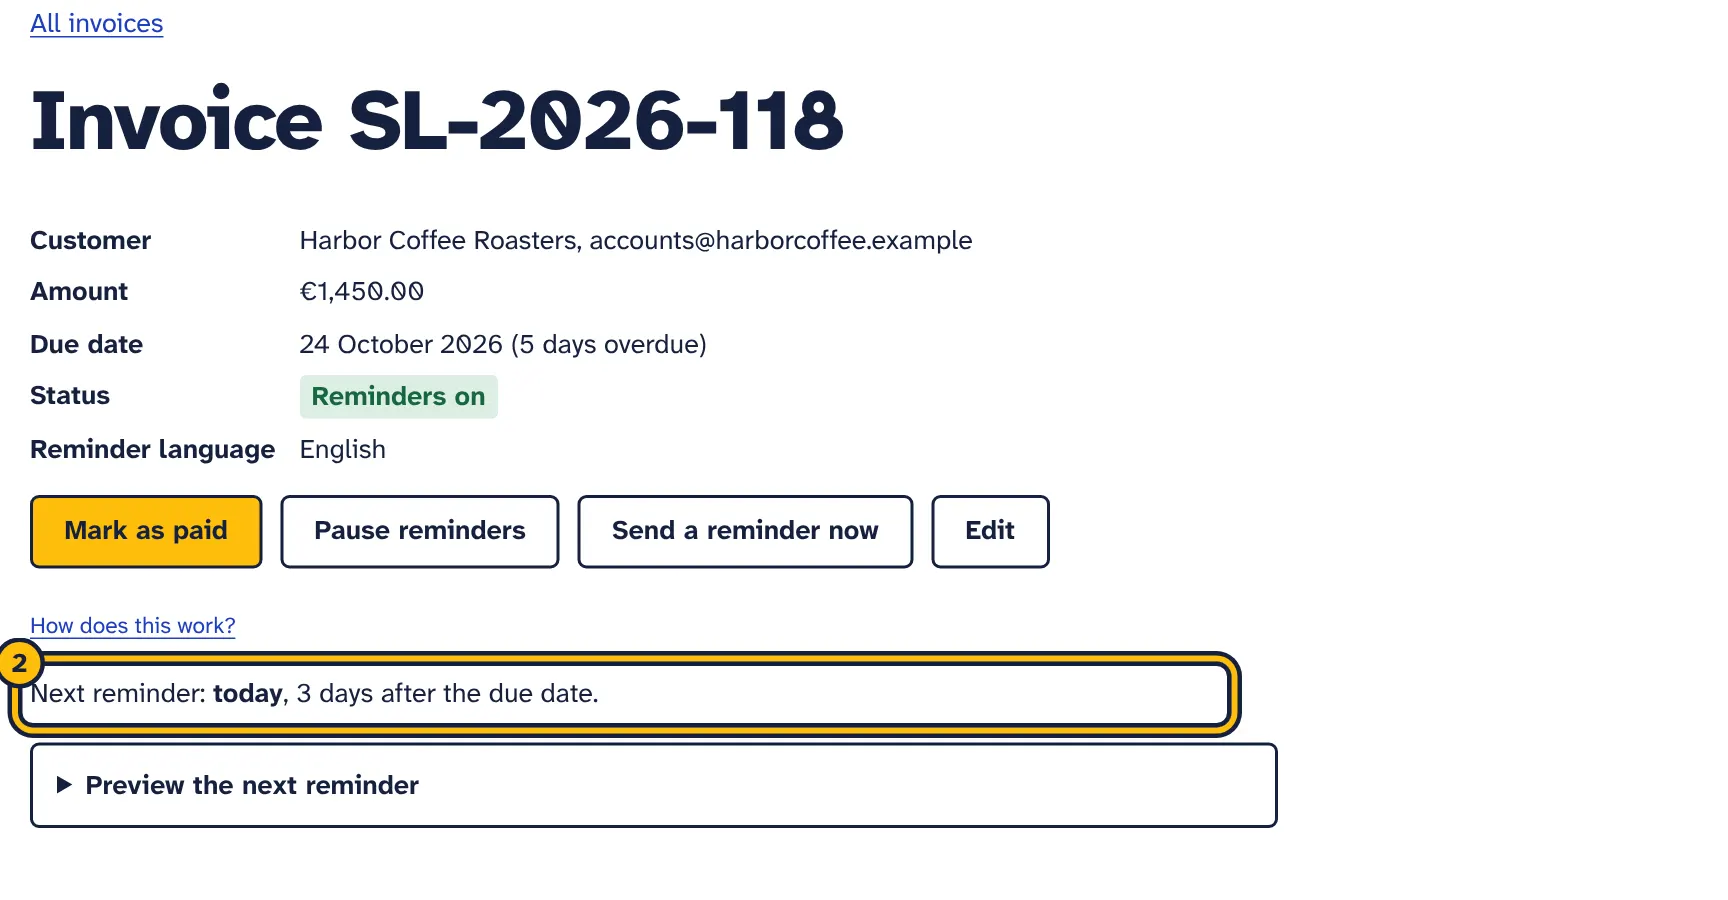
Step 2: You see when the next reminder goes out. -
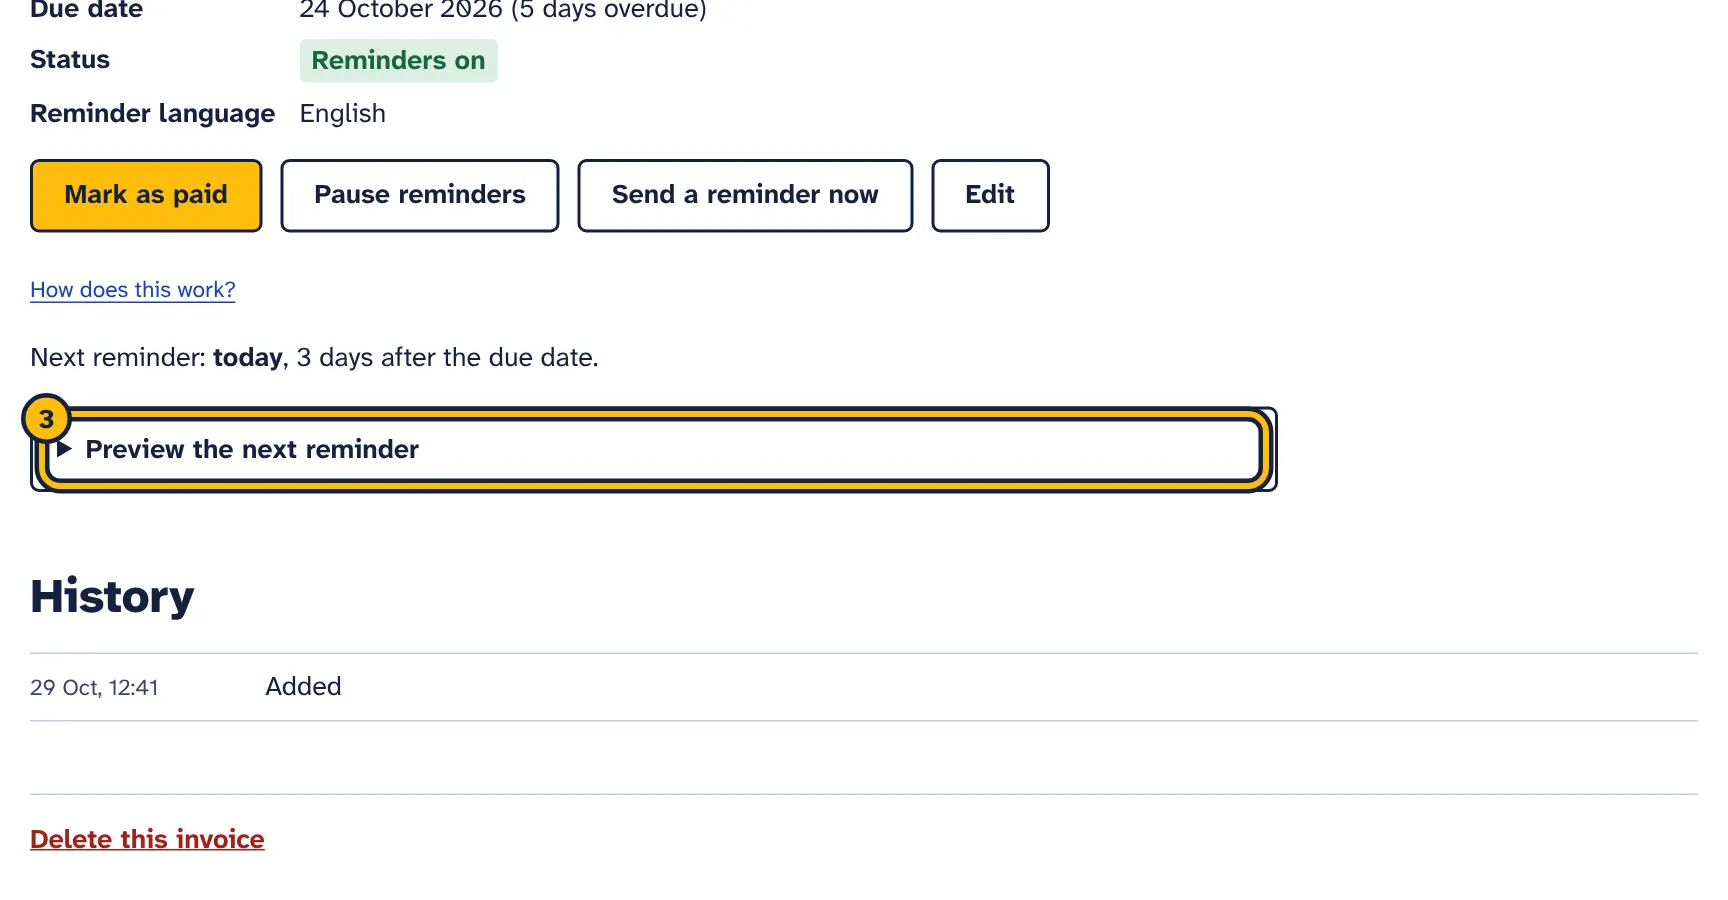
Step 3: Click Preview the next reminder to see the email your customer gets. -
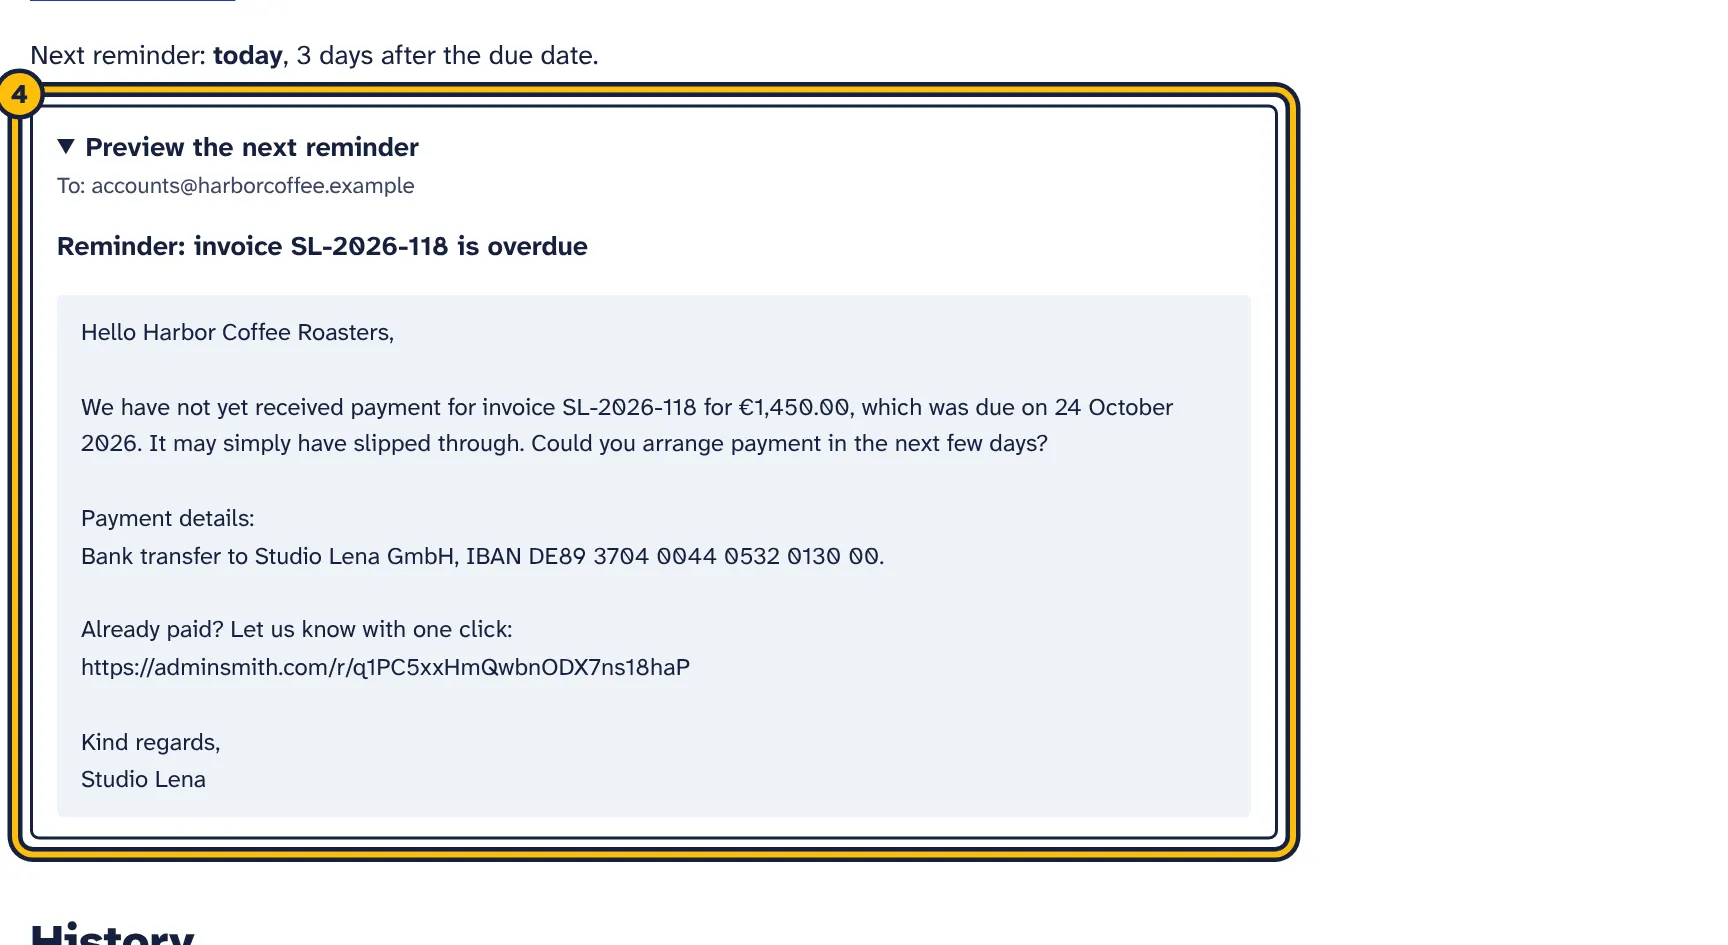
Step 4: This is the email, in your customer’s language, with your payment details. -
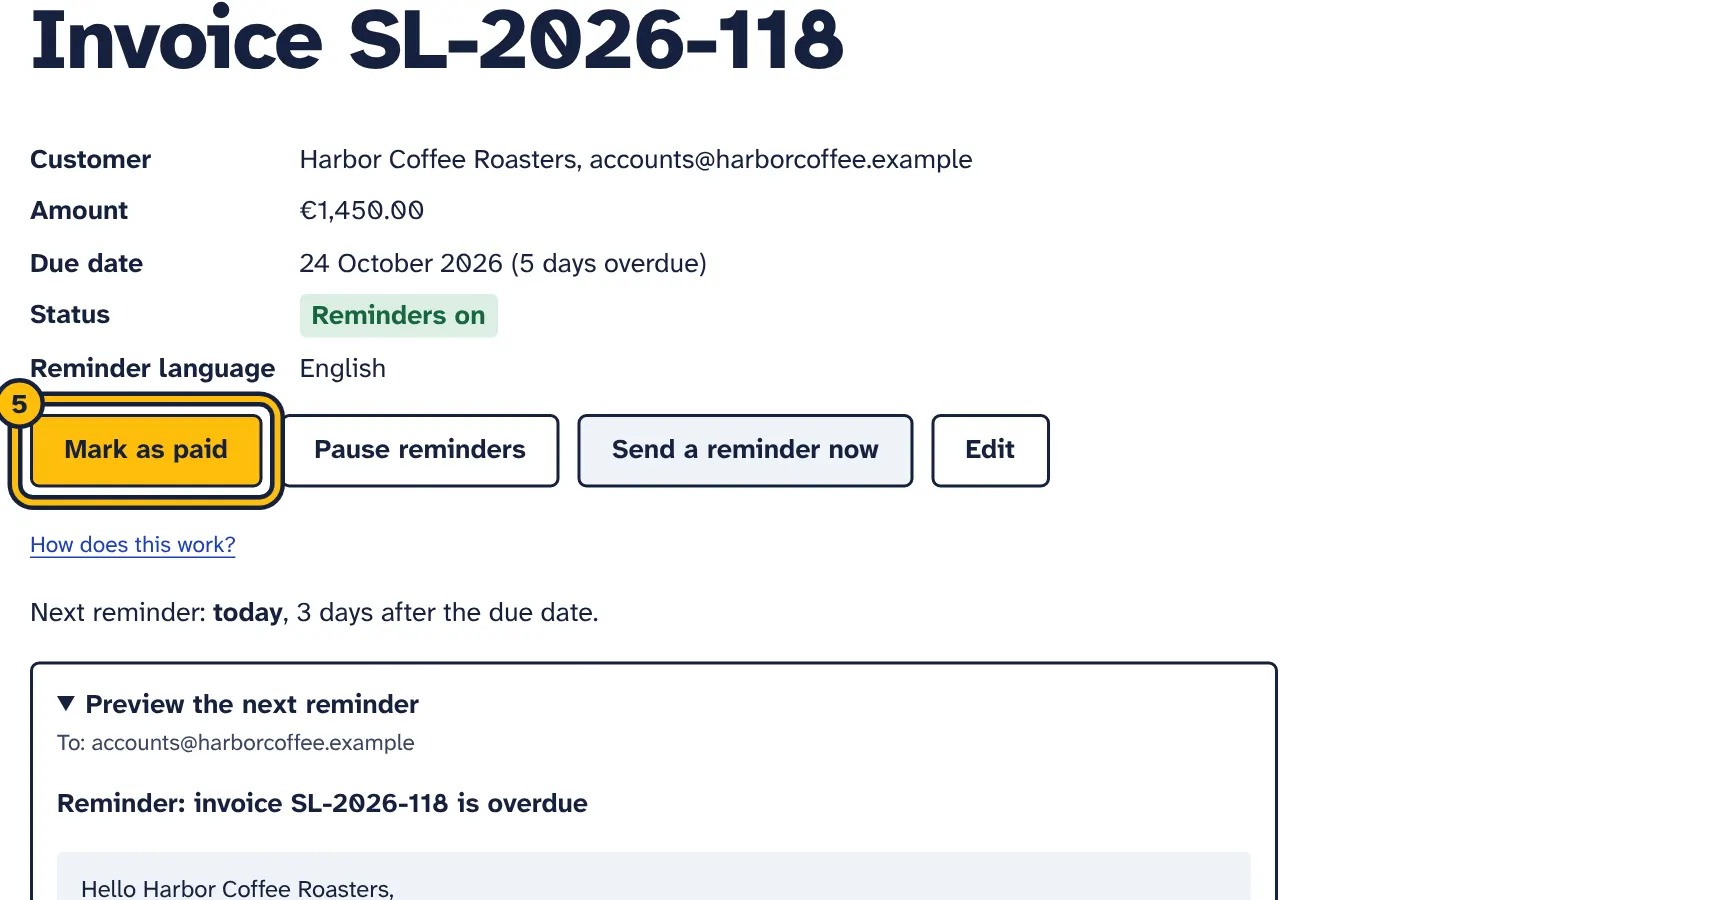
Step 5: When the money arrives, click Mark as paid. Reminders stop at once.
Click an invoice number to open it. The page shows the customer, amount, due date, status, reminder language, payment link, attached PDF and private note, followed by these buttons:
- Mark as paid
- Stops all reminders and moves the invoice to the Paid tab. It no longer counts towards your plan’s unpaid invoices.
- Mark as unpaid
- Shown on paid invoices. Turns reminders back on. Stages already sent are not repeated.
- Pause reminders
- Stops reminders without marking the invoice as paid, for example while you agree a payment plan. The status shows Paused.
- Turn reminders back on
- Resumes a paused invoice, or one where the customer said they have paid. At the next check after your sending hour, it gets the most recent stage it has reached, if that stage has not been sent yet.
- Send a reminder now
- Sends a reminder straight away after you confirm. It uses the text that fits how late the invoice is today: the heads-up before the due date, the due-date text on the day, the 3-day text when 1 to 6 days late, the 7-day text when 7 to 13 days late, the 14-day text when 14 to 29 days late and the final reminder from 30 days, even if that stage is switched off. If the invoice has had no reminder yet, the 7-day and 30-day texts are replaced by the first notice. It goes out at once, also outside the sending hours. It counts towards your limit, and the next automatic reminder waits at least 36 hours. Shown only when your trial or plan is active and your email is connected.
- Edit
- Opens the invoice form. Change what you need and click Save changes. To replace the PDF, choose a new file; to remove it, tick Remove the attached PDF.
- Delete this invoice
- At the bottom of the page. After you confirm, the invoice, its history and its PDF are deleted for good, and the “Already paid” link in reminders already sent stops working.
Next reminder and preview
Under the buttons you see “Next reminder:” with the day and stage, or “No more reminders are planned for this invoice.” Click Preview the next reminder to see the email as it will be sent on that day: recipient, subject and full text, including the number of days overdue on that day. For a paused invoice, or one with no more stages planned, it is Preview the reminder that would go out now, the email that Send a reminder now would send today.
History
The History list shows everything that happened to the invoice, newest first, with the date and time:
- “Added”, “Imported from a CSV file” or “Edited”.
- “Reminder sent”, with the stage, and “sent by hand” when you used Send a reminder now.
- “Reminder could not be sent”, with the reason.
- “Not sent: the monthly reminder limit was reached”, or during the trial “Not sent: the reminder limit of your trial was reached”.
- “The customer said they have paid”.
- “Marked as paid”, “Marked as unpaid again”, “Reminders paused” and “Reminders resumed”.
Changing the due date
If you agree a later due date with your customer, click Edit and change Due date. Reminders already sent are not sent again, so after the new date the schedule continues with the first stage that has not been sent yet. To start the schedule from the beginning, delete the invoice and add it again; this also deletes its history.
What your customer sees
Your customer gets a plain-text email from your address with the reminder, how to pay, and the line “Already paid? Let us know with one click:” followed by a personal link. The link opens a simple page in the invoice’s language. No login is needed, search engines are asked not to list it, and it shows nothing but this invoice.
The page asks “Have you already paid?” and explains: “Let {business} know that you have paid invoice {invoice} ({amount}). Reminders for this invoice stop while they check.” Below is a button Yes, I have paid.
When your customer clicks Yes, I have paid
- Reminders for the invoice pause at once, and its status becomes Customer says paid.
- You get an email with the subject “… says invoice … is paid” and a link to the invoice.
- The invoice page shows when the customer said they paid. Check your bank.
- If the money is there, click Mark as paid. If not, click Turn reminders back on and contact your customer.
Your customer sees “Thank you. We have let {business} know. You do not need to do anything else.” If they open the link again, they see the same message, and you are not emailed twice. Once you mark the invoice as paid, the page says “This invoice is marked as paid. Thank you.” If you turn reminders back on, your customer can use the link again later, and you will be told again.
The page does not take payments and has no box for a message. Customers who want to explain something can reply to the reminder, which comes to your mailbox. If you delete the invoice, the link shows “This link is not valid.”
Plans and limits
Every account starts with a free trial of all tools. After it, Payment reminders needs its own plan, or the All tools plan, which gives every tool its Starter or Pro plan with the same limits. You find the prices on the payment reminders page and under Plan and billing in your account. How plans, upgrades and cancelling work is explained in the account guide.
- Free trial: up to 10 unpaid invoices at a time and 30 reminders in total for the whole trial. Your own reminder texts are included.
- Starter: up to 100 unpaid invoices at a time and 500 reminders a month, with the ready-made texts in 8 languages.
- Pro: up to 1,000 unpaid invoices at a time and 5,000 reminders a month, plus your own reminder texts.
Every plan sends from your own email address and includes payment links, PDF attachments, CSV import and the “Already paid” page.
What counts
- Unpaid invoices are those with the status Reminders on, Paused or Customer says paid. Paid invoices do not count, so marking an invoice as paid frees a place. Deleting one does too.
- Every reminder that is sent counts once, whether it went out automatically or by hand. Copies to you, failed attempts, test emails and the emails we send to you do not count.
- Monthly allowances run per calendar month and start again on the 1st (UTC). Unused reminders do not carry over.
When you reach a limit
- Reminder limit: due reminders are held back, and the invoice history says “Not sent: the monthly reminder limit was reached”, or during the trial “Not sent: the reminder limit of your trial was reached”. On a plan, they go out in the next sending window after your allowance renews or after you upgrade. Send a reminder now shows “You have used all reminders in your trial.” or “You have used all reminders for this month.”
- Unpaid invoice limit: adding an invoice shows “Your plan allows … unpaid invoices at a time.”, and imports stop at the number that fits.
- Trial ended without a plan: no reminders go out, and you cannot add, import or send by hand. Your invoices, settings and history stay, you can still edit invoices and mark them as paid, and your customers’ “Already paid” links keep working.
- Moving from Pro to Starter: your own texts are kept, but the ready-made texts are used.
Troubleshooting
No reminders are going out
- Is your email connected? If not, the invoice list shows Before reminders can go out with a Connect your email link.
- Is your trial or plan active? After the trial, reminders pause until you choose a plan.
- What is the invoice’s status? Only invoices with Reminders on get reminders, not Paused, Customer says paid or Paid ones.
- Does Next reminder say None planned? Every stage you switched on has been sent or skipped. Switch on another stage, such as 30 days after the due date, or click Send a reminder now.
- Is it outside the sending hours, before your Send at hour or after 18:00 in Your time zone?
- Was a reminder for this invoice sent less than 36 hours ago?
- Does the history say “Not sent: the monthly reminder limit was reached” or “Reminder could not be sent”? See Plans and limits and the errors below.
Email connection errors
- “Your email provider did not accept the username or password.”
- Check the Username and enter the password again. Many providers need an app password, which you create in your email account’s security settings.
- “We could not reach your email server.”
- Check the spelling of the SMTP server and the Port. Your provider’s help pages list both.
- “The secure connection to your email server failed.”
- Switch the Port between 587 and 465.
- “Your email server refused the customer’s address …”
- Your mail server would not deliver to the customer’s email address. Check the Customer email on the invoice for typos, correct it with Edit, and send again. If the message adds “or this message”, the address is the most likely cause, but your provider may also have refused the content; ask them if the address is right.
- “Your email server refused the sender address.”
- Make the Sender email address the address of the mailbox you sign in to. Until you have sent a test email successfully, this message also suggests checking the customer’s address, because your server gives the same answer for both. Click Send me a test email under Connections: if the test works, the sender address is fine.
- “The server name … could not be found. Check the spelling.”
- The SMTP server name has a typo or does not exist.
- “Use the public name of the server.”
- Enter the server name your provider gives for sending from outside its network, not a local or internal address.
- “Your email server returned an error: …”
- The rest of the message comes from your provider. Look it up in their help pages or ask their support.
- “Connect your email under Connections first.”
- The connection was removed. Connect your email again.
- “Too many tests. Wait a few minutes and try again.”
- You can send up to 10 test emails in 10 minutes.
Reminders land in spam
Reminders go out through your own mailbox, so delivery depends on your email provider and your domain. These steps help:
- Send from an address on your own domain, such as
billing@yourbusiness.com, rather than a free webmail address. - Ask your email or domain provider to check that SPF, DKIM and DMARC are set up for your domain. These records show that your mail server may send for your domain.
- Use the address that belongs to the mailbox as the Sender email address.
- Ask regular customers to add your address to their contacts or safe senders.
- Keep your own texts short and plain, without lots of links or words in capital letters.
Reminders arrive at the wrong time
- Check Your time zone in Reminder settings and click Save settings. Until you save the settings once, the time zone your browser reported is used, or UTC if it could not be detected.
- Check Send at. Reminders go out from the first check after that hour; checks run every 15 minutes.
- A reminder that was held back, for example by a retry or the 36-hour gap, goes out later the same day before 18:00, or else the next day.
- The time is always in your time zone, not your customer’s.
An email bounced or never arrived
A reminder is recorded as sent as soon as your mail server accepts it. If the customer’s address does not exist or their mailbox is full, the bounce message comes back to your own mailbox. The tool cannot see it, so the history still says “Reminder sent”. Check your inbox for bounce messages after reminders go out, then:
- Open the invoice and click Edit.
- Correct the Customer email and click Save changes.
- Click Send a reminder now if you want it to go out again at once. Otherwise the next stage follows on its date.
If your server refuses the address straight away, the reminder is recorded as failed with “Your email server refused the customer’s address …” and retried as described in If sending fails. This also applies when you get a copy of every reminder: the copy may reach you while the customer’s address is refused, and the reminder still counts as failed.
Your customer clicked Already paid by mistake
Open the invoice and click Turn reminders back on.
A button is missing
- Add an invoice and Import from a CSV file are hidden when your trial has ended and you have no plan.
- Send a reminder now is shown only when your trial or plan is active, your email is connected and the invoice is not paid.
- Your own reminder texts can only be edited on the Pro plan and during the free trial.
Import problems
- Missing columns: rename the headers in your file, or start from the example file. See Import invoices from a CSV file.
- Day and month swapped: write the dates as
YYYY-MM-DD, such as2026-10-31. - Amounts look wrong: check that every amount in the column uses the same decimal separator.
- Everything ends up in one column, or nothing is found: save the file as CSV, not as an Excel workbook.
Still stuck? Email support@adminsmith.com and tell us what you tried. See also Connecting your own accounts and Your account, plans and billing.